Sunday, November 30, 2008

Another patch welded on

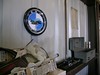
This week picked up where last week left off. But first, I promised to take a picture of my E9 clock, and here it is. They are; I took two.
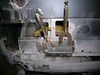
BMW113008-01BMW113008-02

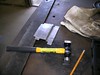
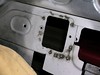
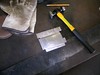
Last week I made the Z-bend for the taillight flange. Today began with trying to hammer a little curvature into the patch, to match the curvature of the body. It does not need to be perfect because it will be finished with POR-15 Epoxy, like the window sill, but a little shape will minimize the thickness. In the process I decided that the only way to cope with the extra thickness along the right edge, caused by a previous repair, was to cut away the upper portion of the flange. That side would have to rely on an upper and lower tab for strength. The upper tab ended up rather small, and I might add some strength there in the future.

I don't think it shows up in the photos but I used a shrinking hammer on the narrow section of the Z-bend, and used the flat - curved face hammer in the picture on the larger faces, hammering into a shot bag. Worked rather well.
BMW113008-03BMW113008-04

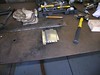
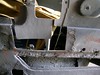
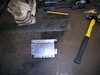
After a thorough scrub with acetone I punched some holes along the flanges to weld through. The places without holes are blocked on the inside. Notice how narrow the top edge became after trimming to fit the taillight opening. That goes back to the Z-bend not ending up exactly where I intended. Oh well, practice makes perfect.
BMW113008-05BMW113008-06

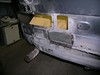
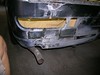
For welding I tried a slightly lower voltage and I held the tip closer to the bead. The welds I did today came out a little better than the last couple of times, except where I welded on the outside. Maybe I needed more light.

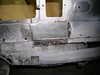
Outside (new patch to your left)
BMW113008-07BMW113008-08 BMW113008-09

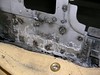
Inside (new patch to your right)
BMW113008-10BMW113008-11

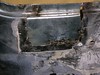
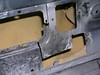
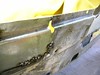
In this last photo I tried to show where the extra layer of sheet metal interfered with the flange I started out with. The original metal can be seen just above the new welds on the inside of what appears to be a previous repair to the same area. My new patch is on the left.
BMW113008-12

Sunday, November 23, 2008

New Rear End Patch

I need to come up with a better way of describing these patches. How many more "new" patches will I make before the job is done? Maybe I should number them.

This one is directly under the left tail light. Actually it is where the bumper attaches. There appears to be some previous repair work in this area, old enough to find lead filler.

Today I fabricated the patch. For this one I decided to use the flanger. The left, right, and bottom edges will get a small flange from my pneumatic flanging tool. The top needs a deeper flange for the bottom edge of the tail light. Next time I will try to curve it a bit, but even so I anticipate bringing the surface up to hight with filler.

I made the first right-angle bend for the top in the vise. I did not align the hardwood form just right, so the bend ended up a little higher than I wanted. I think there is enough along the bottom edge to compensate.

The send right-hand bend was tricky. I ended up champing the piece to the steel workbench and bending in over the thick steel plate you can see in the background. Came out pretty good. What I need is a break ...

BMW112308-01

BMW112308-02 BMW112308-03

BMW112308-04BMW112308-05

Monday, November 17, 2008

Rear End Outer Layer

This week's work was completely straightforward because it continued the work done last week. The main order of business was to weld on the outer layer of the patch I started on last week But before getting to that I spent a few minutes mounting the E9 wall clock I picked up on EBay. Would you believe I did not get a picture of it? Maybe next time.

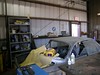
It was the E9 club badge I wrote about a few weeks ago that got me thinking about how my corner of the shop looks. Dreary, for sure. The bay is, well, just a bay. It would not be so bad if there was a beautiful car parked in it. Like beautiful women, a beautiful car can overcome a host of minor flaws. Likewise a plain car generates few expectations. A once beautiful car turned ugly, though, is depressing. This is why I bought the clock. To compensate, to cheer the place up. It's not as if I constantly need to know what time it is.

So the first real work was to drill a bunch of holes to spot weld the patch through. Good thing I bought that new set of drill bits! next I wiped down both mating surfaces with acetone and shot them with Weld-Thru Primer - a.k.a. Weld-Thru Coating. after that is was just a matter of welding it on.
BMW111608-01BMW111608-02
BMW111608-03BMW111608-04

Sunday, November 9, 2008

Dealing With Surface Height Changes

Last week I spent more time planning than executing. That's not a bad thing. When I was in high school I built my own sail boat, and one of the many lessons I learned was measure twice, cut once. I lofted the hull full size on the garage floor and must have walked a hundred miles just walking across the floor to check it.

The upshot of all this is that today I realized that the height change I talked about last time had an impact I had not counted on in the area by the tail light. The good news is that I started the day planning rather than cutting, so I figured out what was wrong before it became a problem. The solution was to use a two layer patch. The last patch was supposed to be at surface level. In fact it is one layer down.

My basic plan for welded patches-not that I have done very many-is to use a picture frame backplate that supports a surface level patch. In the area I am working in now, that plan is inadequate due to the lack of structural integrity around the opening. For this reason I went with a solid patch.

First I made the surface level patch. Not hard even though none of the sides are square. I just held a piece of cardboard against the opening and marked it, then cut it and trimmed here and there. When the pattern fit I transfered it to steel.

The backing plate was even easier. It needed to be 1/2 in. wider and 1/4 in. higher. I had just enough time to weld on the backplate. I finished by covering all the exposed surfaces with POR-15 Metal Prep.

Sunday, November 2, 2008

More Work on Back

I just watched the Colts beat the Patriots. This was the first game in weeks worth watching. Not that I get to watch very many. The Colts especially looked like a Super Bowl team, far more so than the Titans in spite of the difference in their records.

Last week it was too wet to paint the window sill, but today was perfect. That was the last thing I did, so I wouldn't get muck in the wet paint.

The focus of the day was how to repair rusted areas on the rear end where it joins the trunk floor. The original design has a narrow "Z" fold running horizontally accross the entire rear panel, just below the tail lights. The area of the fold is rusted through in several places. I decided not to attempt to recreate the fold, given my lack of skill and the tools available.

Plan A is to recreate the effect by welding up pieces of sheet metal, overlapping at the edge, then smoothing the joint with Epoxy Filler.

I was about to implement plan A in the area below the left tail light when I started thinking like a dentist -- save as much as possible. I ended up reattaching the two sections still remaining after wire brushing away the rust. Next I'll have to add a backing plate, the bottom edge at the joint I worked on today. If that doesn't work it's back to plan A. Because I'll be doing more work in this area next week I skipped painting and instead treated the area with POR-15 cleaner and metal prep.

BMW110208-01

BMW110208-02 BMW110208-03

BMW110208-04 BMW110208-05

BMW110208-06 BMW110208-07

Sunday, October 26, 2008

Left Tail Light Patch

For the first time in a long time it rained today. Long and hard, the kind of rain that replenishes the soil and turns the grass on the slopes of Diamond Head green. Just the kind of day that caused me to worry about primer rust-through. I actually wrote my previous post about painting over primer earlier in the week, but never managed to upload it from my Newton until just now.

My day began with a bit of shopping. The shopping that I was going to do yesterday, but it was my younger son's birthday and that involved a lot of shopping at places that don't sell automotive painting supplies. I picked up a new box of disposable latex gloves, and a spray can of white, general purpose automotive enamel. Even though I had the paint I decided it was too humid to use it. If I had I would have ended up locking in moisture rather than keeping it out.

My goal for the day was to attach the patch for the lower right corner of the left tail light opening. The previous patch around the fog light would anchor this one. The guy working next to me was replacing the headliner in his mini-van, and certainly seemed to know what he was doing. He reminded me that for bare metal the first thing to to use is acid etch primer. I should have used that on the window seal, but besides just flat out forgetting, that job required the application of Epoxy Putty over bare metal, so all is not lost.

The first thing to do was to cut away the part that will be the lower left corner of the fog light. To ensure I had it fit correctly I stuck the tail light assemble into place. With the recess I previously hammer formed just touching the rubber seal, I marked where the opening needed to be cut. The job of finishing the cut was made much easier by a new find, a rotary file for the shop's little die grinder. It made forming the corner much easier than when using a rat tail file. The last step was to punch a series of holes to weld through.

When the patch was fit I used the die grinder's wire brush to remove the Weld-Thru primer left over from last week, wiped the area with acetone, and shot the mating surfaces with Weld-Thru primer. The plan being to shoot the inside with Weld-Thru as temporary fix until I can do it all with POR-15, and to shoot the outside with acid etch primer.

The welding went fine. The pics show a before and after, from different views. The application of the acid etch primer did not fare as well. I managed to get one little fush from the can, then nothing. It wasn't the nozzle that was plugged, it was than can itself. Why? Because the can, still full, had a date of manufacture of 2004. So my only choice was to spray the outside with Weld-Thru primer, too. Next week I get to remove that and use some fresh acid etch primer.

BMW102608-01 BMW102608-02 BMW102608-03

BMW102608-04 BMW102608-05

Sealing the Primer

When I left off work on the rear window sill I had shot it with a generous coat of high-build primer. Since then I got to thinking that in Hawaii's climate, moisture will work into the primer and ruin all that hard work, even though the car is indoors. So I was thinking I should shoot it with some real paint. I checked with the expert at Redline and he agreed.

One term in the equation is how long the car will sit unpainted. A few days is not a problem. A few months is. Right now this is an easy call ... months, if not years! The thing is, whatever I use needs to be compatible with the finish paint.