This post covers last week and this week. Last week was the Sunday after our gamelan concert on Saturday night, so I got a late start and was very tired even then, with the result that I did not accomplish very much. This Sunday was Mother's Day, but that did not cut into my car time because we had dinner at my mother-in-law's, as usual. Chinese food, from Duk Yee, classic local style Cantonese food. The lesson in all this is that when you undertake a large project, be it a car restoration, a house remodeling, or building a boat in your backyard, you need to allow time for the multitude of activities that life has to offer. It's all about balance.
Note: When I was uploading the pics for this blog to
Flicker the response time was ridiculously slow. The uploader even dropped one pic, so that was will appear on Flicker out of sequence. I suspect the reason was people uploading pics from their Mother's Day activities. I upload using Flicker Uploadr for Mac OS X.
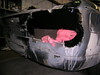
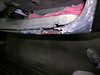
The last time I wrote I had ground out some rust-throughs around the right-hand rear tail light to experiment with POR-15 Epoxy Putty as a small hole patching solution. The last step that day was to do the POR-15 wash - prep - paint routine. Last week I mixed up my first batch of putty and filled in the holes.
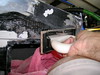
In anticipation of the putty gushing through the holes I cut a piece of cardboard to function as a backing. The idea was to get the putty to spread out on the back side of the panel. This worked very well, although the cardboard has to be helped by a slender screw driver. As I worked the putty I discovered that even with the cardboard the putty would ooze through the holes rather than build up a solid slug, so I stopped trying to do it in a single step. I let the putty form valleys, or craters, where the holes were, the idea being to use those as a foundation for a second application. This worked really well.
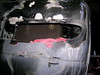
The cardboard did cause the putty to form mushrooms on the back side of the panel, which is a good way to make it stick. I suppose I should consider window screen, too, especially for larger areas that I can reach. This section was difficult because there is an inner panel blocking easy access (thus the cardboard trick).
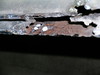
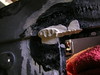
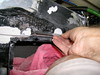
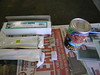
Today began with grinding down the putty. I am pleased to report that POR-15 Epoxy Putty is perfect for grinding. It feels harder than typical body filler, yet it grinds cleanly and with good control. As easy as cake.
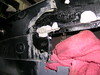
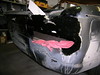
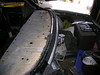
In this next pic you can see where I have ground away most of the high spots, and how this reveals the places where I let the putty push though the holes. Those darker areas are not holes, they are just sunken in a bit. There are three large areas along the top edge of the tail light opening, plus one closer to the trunk opening.
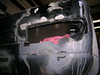
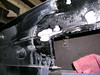
I did not want to grind down to bare metal as this would break the POR-15 seal. It might also weaken the putty patch so much it will fall in. This entire area was ground down to bare metal, and getting there required grinding through a thick layer of primer and paint. So my plan is to create a rivet head effect, and build up the surrounding area back to original thickness using more traditional means.
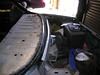
After grinding I roughed up the recessed areas with 400 grit sandpaper, then mixed up a small batch of putty and filled in the low spots. While it was setting I worked on the rear window patch. At the end of the day I ground down the second layer and discovered that I had not used enough at the upper-left corner of the tail light opening, so I added some more.
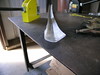
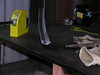
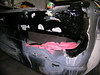
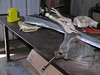
The sheet metal work was all about dealing with the height of the piece. I was very close with the curve, but the center was too high. I decided to work on the right-hand side first, and to bring the end up by shrinking the top edge and stretching the bottom. Up until now I always did the same operation on both edges.
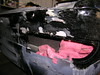
After stretching the bottom the work had a lot of twist.
Shrinking the top took out a lot of the twist, and to get ride of the rest I held the work in the vise and twisted it by hand.
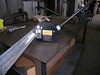
As I worked on the fit I noticed that the two lengthwise bends were opening up. I had made these by bending the piece along the edge of a steel table, but now that the piece was curved I could no longer do it that way. First I tried holding the work gently in the vise and bending with a vice-grip plier with a broard clamping jaw. This worked well in some places, but sometimes it was too tight, so I ended up holing the piece on the table with another vice-grip plier. I did't get of photo of that. It worked, but it is slow.
After working the entire right half I ended up focusing my attention on the last foot, and managed to get back the original shape. Next time I will have to continue the process all the way to the other end.