Next Sunday is the annual All British Car meet. I'll be there with my '74 Lotus Europa, and because the weather was so nice I drove the Lotus to the shop. The problem with that is that people keep coming over to ask about it. I love showing off my Lotus, but I love working on my E9, too.
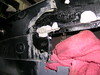
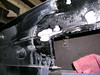
The first order of business was to grind down the putty I applied last time. My trusty CP 854 4"grinder cuts through the POR-15 Epoxy Putty with ease, but the contours around the tail light are too complex for a grinder, so I switched to a hand sanding block loaded with 40-grit paper. A lot slower than the grinder, but accurate.
Like I said before, I don't want to grind down to the surrounding metal surface for fear the patch will fall out the back. In this case this works well because for unknown reasons there is a thick layer of primer in this area and my putty patches should not be thicker than the surrounding finish. I guess the proper technique in thinner spots will be to dimple in the edges of the holes.
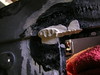
As the hand sanding progressed I could see where I was starting to sand through some of the surrounding POR-15 paint I had appled previously. I decided it was more important to level and feather the putty spots, which meant I would have to repaint the exposed areas. When I was done feathering I roughed up all of the surrounding POR-15 coat with 400-grit and painted everything. Next time I'll apply another coat and start building thickness with some kind of aerosol primer, using the black layer as a check layer.
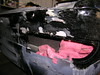
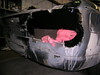
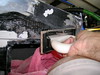
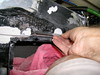
I spent the rest of the time tweaking the patch for below the rear window. I continued what I started last week, using a pair of vice grip pliers to restore the bends, then carefully shrinking, stretching, and twisting to align the piece with the cut out slot where it will go I got to where the patch fits inside the slot, but it needs more tweaking.
One thing I need to buy is some aerosol sanding primer compatible with my base coat paint system.
I finished the day with a drive out to Hawaii-Kai where I sat outside Starbucks watching Japanese tourists gawking at the Lotus.
No comments:
Post a Comment