Another good day with the Lotus.
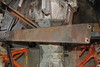
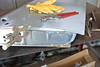
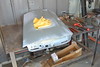
Striped the motor mounts and cam cover. Shot the oil pan with POR-15 etching primer. Shot the cam cover with wrinkle paint. Brushed POR-15 gray on oil pan, black on motor mounts.
Friday, December 20, 2013
Sunday, December 1, 2013
Sunday update with rain
This is the time of year when my job allows me to take a day or two off every week. Sometimes even three. These good times end in January but till then I should have more than enough time to finish the Lotus.
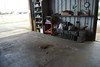
Work today was impacted by rain. Lots of it. I picked up a 3/8 in. brass pipe thread plug needed to plug an extra heater hose connection on the new front cover. Decided not to put in all the plugs until after I paint the front cover. Should look more "factory" that way. Stripped the cam cover, had to work at the door opening and dodge the raindrops.
Next opportunity to work is Wednesday and by then then weather should be back to normal.
Friday, November 29, 2013
Lotus gets a fancy water pump
I know it has been a few months since I posted anything. I have been working on cars, it is just that at the same time I have been working out more with the goal of doing my first triathlon. By the time I even think about writing I am too tired to start. As it turns out, swimming correctly as is required for triathlon is a lot harder to master than I thought, so I never did make one this year. After the Honolulu Century Ride in September I turned all my attention to preparing for the Honolulu Marathon on December 8th. Did the whole marathon prep race series, including to HMSA 30K, but after that I discovered I had a hernia. Just got it fixed on the 18th, and after a month not working on cars I was back at the shop today and felt great.
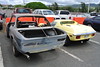
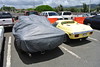
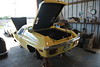
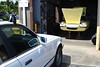
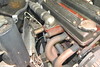
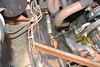
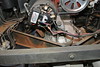
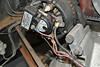
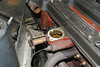
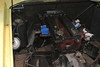
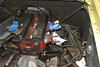
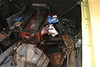
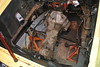
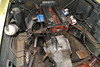
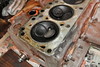
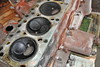
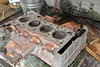
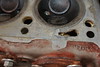
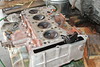
On August 1st I decided the time had come to push out the E9 and bring in the Lotus Europa for it's new water pump. I bought the cartridge type from Dave Ban Engineering. So, yeah, this time the head and oil pan have to come off, but not next time.
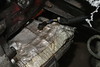
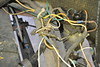
So far I have pulled the engine and transaxle, stripped the paint off the block, pulled the head, dropped the pan, replaced the front cover with the new modified version, and just today got the head back on.

Now that it is set up, time to take stuff apart.

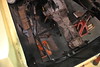
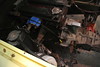
Guess I didn't take any pics of the paint stripping, good thing because hard to get hands clean and dry. Took multiple coats and a lot of scrubbing to get the old enamle off. I painted this motor back in the late 70's when I had the valves redone.
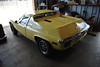
These are from today. Finished with head on but rushing to get out the door. I'll try t start tomorrow with a shot of the head back on.


On August 1st I decided the time had come to push out the E9 and bring in the Lotus Europa for it's new water pump. I bought the cartridge type from Dave Ban Engineering. So, yeah, this time the head and oil pan have to come off, but not next time.
So far I have pulled the engine and transaxle, stripped the paint off the block, pulled the head, dropped the pan, replaced the front cover with the new modified version, and just today got the head back on.
Now that it is set up, time to take stuff apart.
Guess I didn't take any pics of the paint stripping, good thing because hard to get hands clean and dry. Took multiple coats and a lot of scrubbing to get the old enamle off. I painted this motor back in the late 70's when I had the valves redone.
These are from today. Finished with head on but rushing to get out the door. I'll try t start tomorrow with a shot of the head back on.
Sunday, June 23, 2013
RH door skin repaint
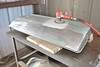
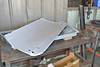
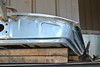
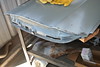
I knew the process of attaching the door skin would bang up the paint, and that I would have to repaint the outside just to keep it from rusting while the rest of the restoration work is done. Last Sunday being Fathers Day I opted to hang out at home, so this week was my first opportunity to do the job.
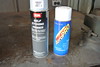
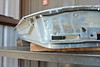
Simple, really, just time consuming. Sand off the thin protective coat applied at the factory, then shoot with etching primer followed by rattle can enamel. The primer is quality stuff, but the enamel will have to come off before the real paint is laid down.
As it turned out it was a lousy, rainy day, so I only shot two coats of primer. Next week I'll finish it up.
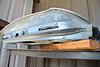
While sanding I used some Vice-Grips to tighten up a few places were I had run out of strength last time.

Simple, really, just time consuming. Sand off the thin protective coat applied at the factory, then shoot with etching primer followed by rattle can enamel. The primer is quality stuff, but the enamel will have to come off before the real paint is laid down.
As it turned out it was a lousy, rainy day, so I only shot two coats of primer. Next week I'll finish it up.
While sanding I used some Vice-Grips to tighten up a few places were I had run out of strength last time.
Sunday, June 9, 2013
RH door skin attached
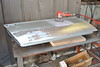
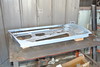
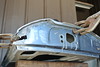
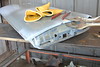
This was a day I thought would never come. The door frame was ready, and the door skin was ready. The time had come to do the deed. I was more than a little apprehensive, because I knew that this was a job I had to get right the first time. Having never done it before, I had zero wiggle room.
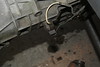
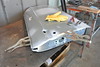
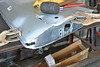
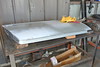
As the pics show, I used a variety of Vise-Grips to hold the door skin in place, and several sizes of channel lock pliers to bend the flange around the edge of the frame.
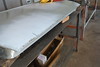
The trick is to get it started, then to take a very small bite with each squeeze and gradually work the flange along. The only problem I ran into was muscle fatigue and blisters. Even though I wore gloves I had blisters for a week.
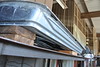
Well, there was another problem, but this one seems unavoidable. All along the edge the nice, pristine skin the pliers left a small line of disruption. Mostly looks like a narrow, shallow dent. No doubt a factory installer could avoid this, but for my first attempt I think this went very well.


As the pics show, I used a variety of Vise-Grips to hold the door skin in place, and several sizes of channel lock pliers to bend the flange around the edge of the frame.
The trick is to get it started, then to take a very small bite with each squeeze and gradually work the flange along. The only problem I ran into was muscle fatigue and blisters. Even though I wore gloves I had blisters for a week.
Well, there was another problem, but this one seems unavoidable. All along the edge the nice, pristine skin the pliers left a small line of disruption. Mostly looks like a narrow, shallow dent. No doubt a factory installer could avoid this, but for my first attempt I think this went very well.
Subscribe to:
Comments (Atom)