Sunday, July 25, 2010

LH nose sand and primer


Spent a lot of time on the E9 today, even though it doesn't seem like much.

BMW100725-01

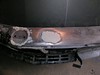
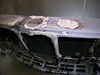
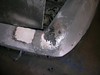
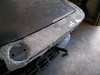
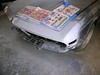
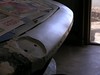
Began with smoothing out the filler applied last week, using sanding blocks and #50 paper. Important thing was to establish the height at the hood cutout corner. This would establish the shape of the concave curve between the hood opening and the top of fender and how the shape progresses towards the roundel mount. Shaping the cutout at the hood opening corner took some work.

BMW100725-02 BMW100725-03

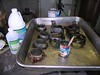
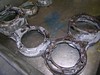
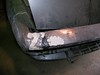
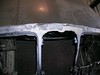
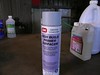
After applying a little more filler I ran the headlight buckets through the POR-15 clean and prep drill. All that black means the Metal Ready is working. I can't decide whether to leave them the way they are or weld in some patches.

BMW100725-04 BMW100725-05

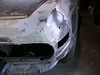
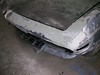
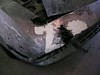
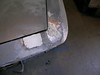
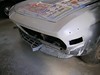
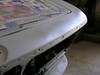
Did more sanding, found more low spots, especially at the LH corner. Add more TECHNIFILL.

BMW100725-06

The contours finally began to come into focus. Spent a lot of time working out the curves at the LH corner, were multiple curve planes converge.

BMW100725-07 BMW100725-08 BMW100725-09
BMW100725-10 BMW100725-11
BMW100725-12 BMW100725-13 BMW100725-14
BMW100725-15 BMW100725-16 BMW100725-17

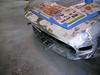
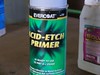
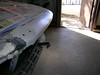
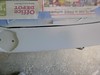
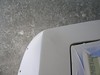
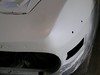
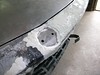
Eventually I reached the point where I had to paint the entire area to get a better look at the contours. Began with Evercoat #720 Acid-Etch Primer, and after a thirty minute dry time a few coats of High Build Primer. I'll start sanding that next week.

Sunday, July 18, 2010

Shaping the nose

Today's shop session was short because my wife and I attended a concert by Jeff Peterson and Riley Lee. It was a great performance.

BMW100718-01 BMW100718-02 BMW100718-03

I started by smoothing out the epoxy filler sections, first with my grinder and later by my orbital sander and hand sanding block. The goal was to lope off the high spots but not too much, as these areas were filling low spots. The area around the RH side of the roundel recess needed Epoxy Filler to blend in the fiberglass patch, so I decided to proceed only on the LH side.

BMW100718-04 BMW100718-05

I sanded away the protective layer of paint I had covered the area with, back to bare metal. Then came an initial application of TECHNIFILL. When that had set I sanded it a bit, then added a second batch, which is how I left it. I was able to shape the filler around the roundel recess using a ball-shaped grinding stone.

Sunday, July 11, 2010

Happy July 4th

Actually July 4th was last Sunday, which is why I did not work on the car. Quit early today to attend a dinner party for the Red Hot Ladies, my wife's cycling club. Crazy weekend: Lance is out of contention in the TdF, Lotus had two cars run the entire race at Silverstone, and Spain beat Netherlands in the World Cup final game. Tweets coming thick and fast.

BMW100711-01

Most of the week it has been overcast with light rain. I've been riding my bike to work, and getting wet every day. Today it finally felt like July.

I checked the POR-15 paint applied two weeks ago. Found no ill effects of thinning with solvent.Even so I would not recommend that combination.

BMW100711-02 BMW100711-03 BMW100711-04

Applied POR-15 Epoxy Filler to the welded-in patches at the center and RH side of the nose, including the top of the center grill opening. When filling small holes I try to apply from behind, to create a rivet effect. If the back side is inaccessible I just press really hard to get the filler to squish out.

BMW100711-05 BMW100711-06

Filled three small rust-through holes with fiberglass and POR Patch. Managed to do it without getting any on me.

BMW100711-07

Used my CP grinder and disc sander to smooth out the fiberglass patch and filler applied several sessions ago on the LH side. I added a second layer of cloth after the first had set. Today I discovered that adhesion of the second layer was weak. Getting anything to stick to POR-15 is tricky.

BMW100711-08

That last thing I did was apply filler over the smoothed down fiberglass, because by design the cloth sags down a little into the hole.