I made a useful discovery last Sunday. Don't paint something with POR-15 that will be welded. I was going to say an important discovery, but that sounds overly dramatic. When POR-15 gets hot it gives off wicked smelling fumes sure to make a hypochondriac pass out, and when it gets really hot it burns.
And now for some good news. I did my first weld on the car. Talk about passing a milestone! Break out the Champagne. Oh wait, this is a German car. A case of Heineken would be more appropriate.
The week before last I did work on the car, but I didn't get enough done to warrent a blog entry. Actually I spent a lot of time talking to Gene about the swap he has in mind for his BMW station wagon. What work I did was all prep for this past Sunday. Mostly working the patch to get the best possible fit. I finished by painting what would be the inside of the patch with POR-15, because after it is welded on there is no access to that side.
One bit of disappointment: Some POR-15 I had applied weeks ago was peeling of in two places. I was looking for nicks caused by repeated trial fitting of the patch, especially when it was one long piece, and in the process found two places a bit smaller than my fist that peeled off rather too easily. I made sure I roughed up the surface to get a better stick before repainting. When it comes to painting, surface prep is everything.
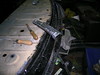
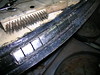
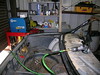
My idea of the wire hook to pull one end of the patch up into position worked great, only it was cumbersome with welding gloves. I set up my welder Using the settings worked out on practice welds and got good results. Some spots didn't bite and create enough penetration. I think I was holding the tip too far away, or else too close. I definitely agree with advice others have given me, that grinding down the welds takes longer than making them.
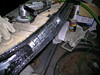
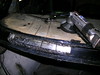
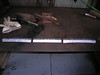
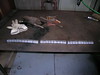
I made sure each of the patch segments got at least two good spot welds. The last thing I want is to have movement here as that will ruin the finish in a highly visible location. I finished with an application of epoxy putty all around the edges and along the gaps between sections. Later on this will all need to he filled in a lot more, but I want to see how this much turns out first.
Like I said, painting the inside of the patcb with POR-15 before welding was a mistake. For the next one I plan on using weld-thru primer. I am also thinking about drilling a series of holes along the bottom of this hollow box section for applying rust proofing. I'll need rubber or plastic plugs too.
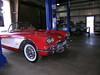
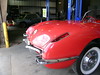
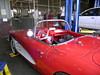
I had a inspiring neighbor that day.
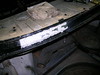
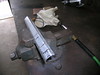
The first patch to be welded onto the car!