Sunday, May 30, 2010
All British Car Day
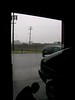
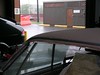
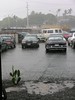
Today was All British Car Day, so I was there showing my Lotus. Another perfect Spring day. My photos are in a set on Flickr. A big mahalo to the British Car Club of Hawaii, president Brett Pruitt and all of the sponsors.
Sunday, May 23, 2010
Patch for nose center top, #3

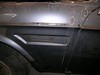
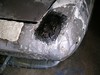
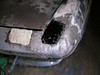
While was waiting for paint to dry I removed the LH front fender vent ornament. All four holes were cracked. Maybe by design?
Next Sunday is All British Car Day so I will be showing the Lotus at Kapiolani Park. I might drop by the shop in the afternoon.
Sunday, May 16, 2010
Patch for nose center top, #2
Last week was Mother's Day, so no work done on the car. Had a nice day, breakfast at Anytime Cafe, dinner at grandma's. Using my new MyTouch 3G tethered to my laptop to Skype my son on the mainland and celebrated his birthday, which was Monday.
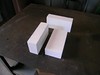


My last session ended needing fire bricks. After many phone calls revealed there were non to be had at the expected places -- building supply stores -- the good folks at the Hawaii Potters Guild directed me to Ceramics Hawaii on Kokea Street in Kalihi. I got three because they are fragile.
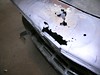
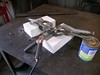
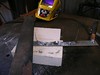
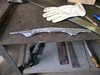
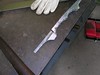
The first thing I did was practice setting up the weld so that the pieces would not move and so that I had room to weld. After practicing on scrap I set up the real thing, using metal plates as extra weight. The bricks isolate the work from the table, and attaching the ground lead without distorting the work was a challenge.
I decided to leave the piece flat to make welding easier. Now it was time to add the bend. To do this I clamped it in the vise with a piece on edge at the center line, then to do the bend I tapped a screwdriver as a wedge between the piece and the jaws. Worked great ... too bad I didn't get a pic.
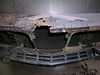
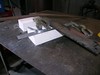
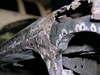
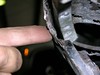
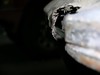
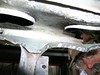
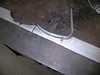
After trimming away the extra material I started refining the fit. Soon the crumpled rusty metal at the nose was in the way, especially on RH side, so I cut it away. Sort of a turning point. With that removed I discovered a bump caused by a thick lap seam on the RH side. This required a deep flange to clear it.
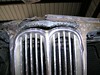
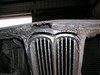
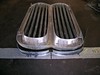
As I ground away the curves at the ends I checked the fit with the grill. The last pic shows it best. I still have a little too much gap, but I plan on adding a layer of Epoxy Putty to soften the curves, so I need some room.
It looks to me like I need to remove a little more on the LH side, but it was getting late so I'll have to finish up next week.
Sunday, May 2, 2010
Patch for nose center top
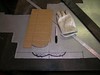

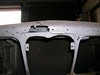
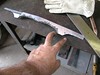
Continuing work on the nose, I got started making the patch for the top of the nose center section. This will go behind the outer skin. Basically it will be one 16 in. wide strip that extends down a bit along the edges of the center opening.

The original sheet metal here has deeply flanged edges. Mine will have extra curved pieces welded on. I stopped at welding because I need to buy a fire brick.
The fiberglass patch applied last time had some "dry" spots, so I roughed it up with #100 sandpaper and appled another coat of POR Patch.
Subscribe to:
Posts (Atom)