Showing posts with label acid etch primer. Show all posts

Saturday, November 5, 2011

Finally got RH nose under control

BMW111105-01
I never did make it in during the week, as I had hoped, so I had to start by applying filler on the low spot I found last week.
BMW111105-02 BMW111105-03
While the filler set I worked on the LH door. I discovered there were no fasteners holding on the wood trim panel. I just tapped it up and free with a candy hammer. I also removed the window lift motor. Note the one short bolt in the photo.
BMW111105-04
When the filler was ready I spent what time I had smoothing it and the surrounding area. I went ahead and applied a coat of etching primer and a coat of white enamel even though the area is not ready or finish paint. This coat is there as a moisture barrier, to prevent new rust while I work elsewhere.

Saturday, October 15, 2011

LH door off, LH nose painted

Had a good day today. The kind of day where everything just works. Finished everything I planned to do with time to spare, so I had a relaxed lunch with my wife.

I bounced back and forth between painting the nose ... what I wanted to do last week ... and removing the LH door.

BMW111015-01 BMW111015-02 BMW111015-03 BMW111015-04 BMW111015-05

I used a #6 metric hex wrench on that special hinge bolt, and to get better grip I cleaned off the paint with a small, pointy wire brush in a die grinder. Came out easy.

On the RH side the door window motor ground wire on the inboard end was attached to the frame with a screw. On the LH side things were different. The original ground wire was extended with a sliced in section, then went to a multi-terminal ground point which was not connected to anything. Odd.

BMW111015-06 BMW111015-07 BMW111015-08

Wiped down the nose with acetone, applied two coates of acid etch primer, them two coats of white finish paint. This area is not finished, I just want to keep moisture out.

Next week I need to get the RH nose to the same level of completeness and disassemble the LH door.
posted from Bloggeroid

Sunday, October 9, 2011

Bad shoulder brings me back to nose

On Friday I had an acupuncture session on my shoulder to treat an old issue that was aggravated by the century ride. That meant I was resting, so no hard efforts or heavy lifting. I decided to put off working on the left door and instead returned to the nose.


After my Friday appointment I stopped by BMW of Honolulu to walk the lot and get a price quote on rubber bits for the doors. Saw a super clean used 3 series wagon, too new, too expensive, and a great looking new Mini Cooper Coupe. Not what I need. The quote came to $2,000. The expensive pieces are the door seals at $400 and change each side. Seems excessive, but what can you do? Still no word from the guys in England.


BMW111008-01 BMW111008-02 BMW111008-03 BMW111008-04 BMW111008-05 BMW111008-06 BMW111008-07

My goal for Saturday was to get a coat of etching primer and a coat of enamel on at least the LH side, including the bumper mount and the top side of the air dam. I would have made it were it not for the car in the bay next to mine -- late model, pure white -- and wind -- not blowing away from that bay. I plan on going back Wednesday long enough to shoot it. I did do the POR-15 wash anf prep drill.

BMW111008-08 BMW111008-09

Since I had a little time I decided to get started on the LH door by removing the outer window trim piece. It just lifts of, no screws. Between the rusty clips and the rusty sheetmetal underneath, it was a bit of a fight. Previously I left the RH piece alone, but my curiosity got the netter of me so I tried to remove the part with the fabric and fuzzy stuff that rubs against the glass. Turns out it bends really easily. That, and the lack of rust, suggests it is made of aluminum. I wonder where I can source that felt fabric?

I spent Sunday afternoon shopping for a car to replace my van. Stopped by Servo to look at a 328IS (I am really looking for a wagon) and the salesman turned out to be my old friend Eddie Higa. What a small town. Also checked out a private party 5 series wagon, turned out the mechanic is a cycling buddy. Might be the perfect car. I'll call him Monday.
posted from Bloggeroid

Saturday, August 20, 2011

Bad paint

When I arrived at the shop this morning the door to my stall was open. No doubt this was because of the heat we have had the past few days, but since it has probably been a year since the last time it was open, the sight of the exposed rear end was a bit of a shock. It made me realize that I did a lot of nice work back there, but I moved to the front long before the back was anywhere close to finished. Now at the front, my progress has slowed because I am trying to achieve "paint ready." I did not go that far in the rear because I was worried about my ability to repair the nose.

The only real challenge left is the doors. Everything else is time and money. Replacing doors skins sounds straightforward, but since I have never done one it remains a challenge. Right now the challenge consists of finding them -- nobody I have contacted by mail had replied.

I spent some time today on the lower front panels, sanding and filling small voids with putty. Very close to paint ready.

BMW110820-01 BMW110820-02

BMW110820-03 BMW110820-04

The last part of the session was spent fixing the alligator skin primer on the LH corner. I wet sanded it smooth with #150, and went a little deeper just to be sure. I thought perhaps the problem was a layer of oil from sitting in the shop so long, so before painting I scrubbed the area well with Marine Clean, then treated the exposed metal with Metal Prep. When that was dry I shot it with POR-15 Etching Primer, because beneath this area is a fiberglass patch. I thought the poor adhesion may have been due to the POR-15, even though the bad paint covered a much wider area. The result looked good, but I had to go before it was completely dry.

A couple of notes. First, I don't think it is a good idea to paint directly over an application of Metal Prep. A better method would be to rub the dried surface with Scotch Brite, to improve adhesion. Second, in places like this where oily dust may have settled on the surface, wash it with Marine Clean and use Scotch Brite rather than just a brush.

posted from Bloggeroid

Sunday, May 29, 2011

Back to the E9 nose

With the Lotus back on the road I can once again turn my attention to the subject of this blog. But time is running out on the van. It needs a new belt idler pulley and again the fans are not coming on. I'll try to do those things at home.

Before I went to the shop I checked here to see what I had last done on the E9. My starting point was sanding down the filler applied at the end of the last session. So many weeks have passed that I had to wash the nose down with soap and water to prevent grinding oily dirt into what I sanding.

The good news is that after a lot of sanding I finally started to feel the contours emerge. This is hard to explain. You start with rust or collision damaged sheet metal, cut holes, weld patches. It is a mess. As the fillers go on and are shaped, something special happens. The long, smooth contours of the original panel begin to emerge. Sanding is not just about smoothing, it is about exposing the original shape.

BMW110528-01 BMW110528-02
BMW110528-03 BMW110528-04
BMW110528-05

At the end of the session I could feel this happening. Many contrasting layers and colors of paint and filler interfere with the discovery, so I ended the session with a coat of etching primer. I will try to stop in one afternoon and shoot some sanding primer on top, to make next Saturday more productive.

posted from Bloggeroid

Sunday, February 27, 2011

E9 nose patch continued, and Lotus lower links.

When I arrived at the shop yesterday my car cover, the new one, was as far off the car as the lock cable would allow. Meaning mostly on the ground. Sorry, no photo, but you can imagine. Then Carl tells me that on Friday a mini-tornado circled the building, spinning rubbish up into the air and blowing all the loose papers off his desk. Yet all this time it has been dead calm. Weird. At least the Lotus didn't go airborne.

Lotus110226-01

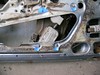
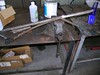
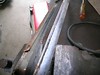
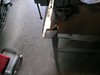
I began by unpacking the Lotus parts shipment that arrived this week, two lower links and spindles for both sides. while they look good, one link, the front I think, is slightly bent. I am thinking there are no straight links left on the planet. I checked it with a straight edge, the bottom is perfect, the top is slightly concave. Much straighter than mine.

BMW110226-02

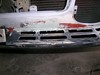
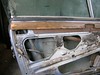
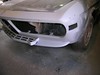
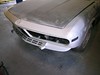
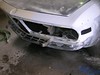
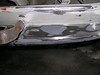
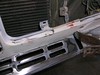
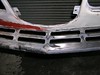
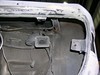
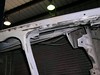
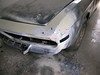
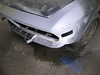
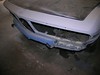
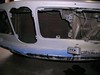
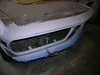
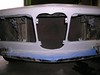
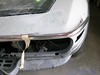
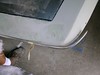
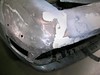
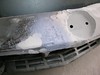
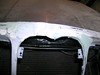
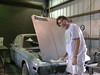
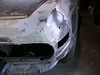
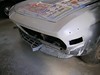
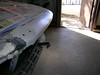
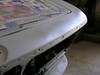
Next I turned to the E9. Ground last week's welds, checked for a tight weld, and wire brushed clean. I decided to apply filler at the end of the session, in case something else needed doing.

Lotus110226-03 Lotus110226-04

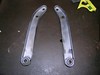
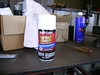
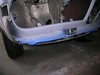
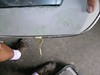
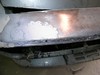
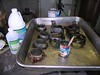
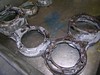
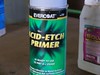
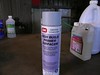
Next came the Lotus lower links. The outside had been wire brushed but the inside were still painted and funky so it was off to the media blaster for some glass bead action. After a wipe down with acetone I shot them with acid etching primer.

BMW110226-05 BMW110226-06

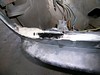
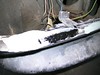
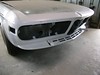
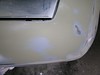
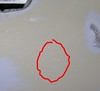
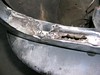
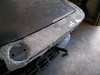
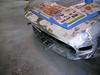
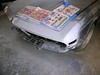
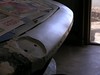
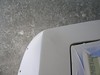
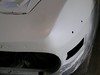
While the paint dried I applied POR-15 Epoxy Filler to the new E9 nose patch. After the second coat of primer was shot I used POR Patch to add a fiberglass patch the the small line of rust holes just inboard.

By next week I should have new inboard bushings to press in and the anti-roll bar drop links. Maybe I'll take a day off and do the whole lob in one session. We'll see.

posted from Bloggeroid

Sunday, August 1, 2010

Still raining in August, more nose work

This certainly has been an odd summer. Drought all winter, and finally some rain in July which continued into August. Not much, but enough to help.

BMW100801-01

I picked up some etching primer and a new tube of Por Patch at Redline Automotive, then spent my day sanding and filling. When the filler was hardening on one side I worked on the other.

BMW100801-02 BMW100801-03 BMW100801-04
BMW100801-05 BMW100801-06

I dug out the front body trim to use as a guide for shaping the curves at the corners, both of which have some old damage. Today I was only far enough along to check the LH side, but I did discover that I had to build out the front and side to get a good fit. I applied the POR-15 Epoxy Filler just before leaving.

BMW100801-07 BMW100801-08 BMW100801-09
BMW100801-10

Redline had a can of etching primer they claim goes on over POR-15 paint, so I used that to cover the fiberglass patch on the RH corner. Went on thin but no hassles. Did a lot of sanding and filling with TECHNIFILL to level the RH side.

BMW100801-11

Spent a lot of time sculpting the top of the center grill opening, at least on the LH side. The trick is to find the original planes, then soften the curves. The two major planes are the vertical face at the front edge, and the angled plane of the grill openings. As I got those developed I found a low spot at the top of the pillar, and on the inside of the upper, curved opening. Added some TECHNIFILL there.

BMW100801-12

Would you hire this guy to work on your car?


Sunday, July 25, 2010

LH nose sand and primer


Spent a lot of time on the E9 today, even though it doesn't seem like much.

BMW100725-01

Began with smoothing out the filler applied last week, using sanding blocks and #50 paper. Important thing was to establish the height at the hood cutout corner. This would establish the shape of the concave curve between the hood opening and the top of fender and how the shape progresses towards the roundel mount. Shaping the cutout at the hood opening corner took some work.

BMW100725-02 BMW100725-03

After applying a little more filler I ran the headlight buckets through the POR-15 clean and prep drill. All that black means the Metal Ready is working. I can't decide whether to leave them the way they are or weld in some patches.

BMW100725-04 BMW100725-05

Did more sanding, found more low spots, especially at the LH corner. Add more TECHNIFILL.

BMW100725-06

The contours finally began to come into focus. Spent a lot of time working out the curves at the LH corner, were multiple curve planes converge.

BMW100725-07 BMW100725-08 BMW100725-09
BMW100725-10 BMW100725-11
BMW100725-12 BMW100725-13 BMW100725-14
BMW100725-15 BMW100725-16 BMW100725-17

Eventually I reached the point where I had to paint the entire area to get a better look at the contours. Began with Evercoat #720 Acid-Etch Primer, and after a thirty minute dry time a few coats of High Build Primer. I'll start sanding that next week.