Sunday, August 29, 2010

Nice to be back, still on the nose

The road trip was a blast. You can see my picks on Facebook. Great to be back.

BMW100829-01 BMW100829-02 BMW100829-03

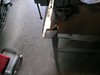
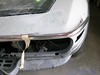
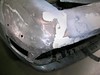
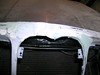
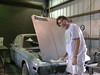
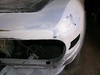
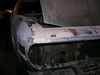
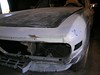
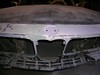
Today was about finding the correct shape for all those compound curves at the nose. Along the way I decided to remove all of the remaining rusty bolts from the aluminum trim piece. Before I began I did a left - center - right photo sequence to document my starting point.

BMW100829-04 BMW100829-05 BMW100829-06

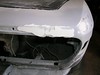
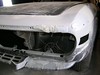
The first thing to do was shape the curves at the LH corner. I took a serious of photos to show how the shape gradually appears.

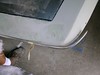
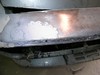
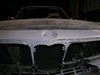
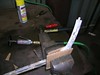
I have been using the aluminum trim piece as a guide for shaping the nose, which appears to have been moved rearward here and there. Getting the bolts to line up with the holes was a time waster, so I decided to remove them. They slide along the grove to a wide spat midway between center and each end. All the bolts are rusty and the aluminum is corroded. In some cases it took a shot of PB Blaster. One had to be ground out.

BMW100829-07 BMW100829-08 BMW100829-09

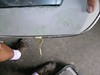
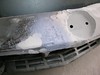
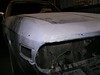
After getting the LH side as good as I could I worked on the rest of the nose. There are some ups and downs on both sides, but the RH side especially.

BMW100829-10 BMW100829-11 BMW100829-12

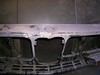
I ended the day with an application of TECHNIFILL in some places and POR-15 Epoxy Filler in others.


Sunday, August 1, 2010

Still raining in August, more nose work

This certainly has been an odd summer. Drought all winter, and finally some rain in July which continued into August. Not much, but enough to help.

BMW100801-01

I picked up some etching primer and a new tube of Por Patch at Redline Automotive, then spent my day sanding and filling. When the filler was hardening on one side I worked on the other.

BMW100801-02 BMW100801-03 BMW100801-04
BMW100801-05 BMW100801-06

I dug out the front body trim to use as a guide for shaping the curves at the corners, both of which have some old damage. Today I was only far enough along to check the LH side, but I did discover that I had to build out the front and side to get a good fit. I applied the POR-15 Epoxy Filler just before leaving.

BMW100801-07 BMW100801-08 BMW100801-09
BMW100801-10

Redline had a can of etching primer they claim goes on over POR-15 paint, so I used that to cover the fiberglass patch on the RH corner. Went on thin but no hassles. Did a lot of sanding and filling with TECHNIFILL to level the RH side.

BMW100801-11

Spent a lot of time sculpting the top of the center grill opening, at least on the LH side. The trick is to find the original planes, then soften the curves. The two major planes are the vertical face at the front edge, and the angled plane of the grill openings. As I got those developed I found a low spot at the top of the pillar, and on the inside of the upper, curved opening. Added some TECHNIFILL there.

BMW100801-12

Would you hire this guy to work on your car?