Saturday, July 30, 2011

More nose, a little buffing

Before getting to this week's work, I want to share a nice YouTube video I picked up on Twitter via @classicheroes. It captures the classy side of the coupe beautifully.

BMW110731-01 BMW110731-02

I got started today with that blob of filler in the center grill opening. A while back I bought a new rotary file bit to use in the die grinder, because the shop's is worn out. Today was my first time using it. Worked great on those concave curves. I had some work to do to center the downward pointing dip. I wanted to take more off on the RH side but am down to bare metal, so I have to extend the LH section downward to balance it. I also noticed a low spot on the LH side, on the forward facing section bordering the grill opening. For these places I decided to switch to TECHNIFILL, because the amount to fill is small and I could do more than one cycle today.

BMW110731-03 BMW110731-04 BMW110731-05

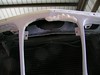
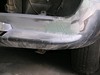
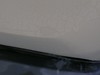
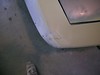
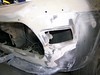
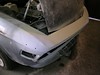
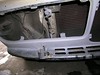
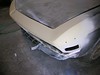
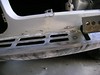
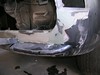
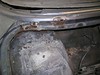
While working here I noticed that I had lost some of the indent where the upper panel joins the front panel. I decided to see if I could re-create it, but I ran into metal right below the primer, so I'll just leave it alone. This area is covered by the trim strip.

BMW110731-06

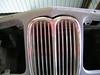
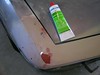
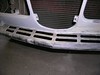
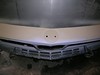
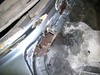
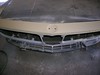
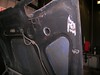
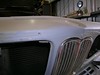
While the filler set I decided to experiment with cleaning up the grill, with the help of my Makita buffer. I started with the compound I got for cleaning up the Lotus after I repaired the scratched paint, Meguire Fine Cut Cleaner . When that did not work a miracle I tried Griot's Mag Wheel polish, the stuff I used to polish the carbs on the Lotus. This is a more traditional metal polish, the kind that stinks and needs a good stir before using. Again, no miracles. I decided to bring all that stuff home and work on it by hand after dinner, while watching TV.

BMW110731-07

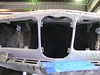
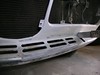
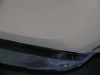
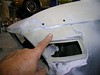
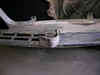
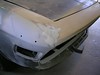
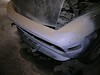
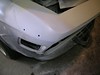
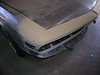
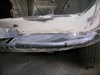
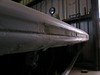
Back to the nose. After a round of sanding I could see I was getting close, but I needed a little more thickness in a couple places. I added another layer and called it a day.

posted from Bloggeroid

Saturday, July 23, 2011

Center grill

This morning I concentrated on the center grill and grill opening. I'll get back to the bad primer when I locate more wet/dry sandpaper.

BMW110723-01 BMW110723-02 BMW110723-03

The LH side of my replacement grill opening came out slightly higher than the RH side. So the gap between the grill and the opening is too large on that side. After grinding off all the primer I added some POR-15 Epoxy Filler. Ran out of time to shape it, mostly because I started working on the grill.

The grill has two issues. One of the studs is missing, and it has three small dents about two inches from the top, in the verticle bars. Right behind the upper mounting brackets. Couldn't find a replacement stud, but I did smooth out the dents. Not perfect, but a big improvement. Didn't get a picture, yet. And it needs a good polishing.

BMW110723-04 BMW110723-05

I spent time on the panel below the LH grill opening, applying two layers of TECHNIFILL in the process.Still not done, but a lot better. Before leaving I applied POR Patch to the fiberglass patch from last week. I like that technique.

posted from Bloggeroid

Sunday, July 17, 2011

Spotting putty, upper grill opening flange

I went back to the NAPA paint center in Pearl City to pick up some wet/dry sandpaper and some spotting putty. Good news, one of the guys from the old Redline in Kalihi was working. Maybe things will work out after all. The bad news: out of anything near #100. The shop is much too small.

I am back to my short Saturday morning schedule. I really need to take some time off to make any progress. I think the Navy Seals were on the ground in Pakistan longer than I worked on the E9.

BMW110716-01

There is a series of small rust-through spots on the upper edge of both grill openings. More so on the LH side. I patched the LH side with fiberglass and POR Patch. This time I covered the metal with POR Patch and laid down the cloth, then stopped. Next time I'll saturate the cloth, maybe with POR paint. My goal is to avoid pulling the cloth out of position, especially pushing it through the holes.

BMW110716-02

Tried out the spotting putty on several places, worked well. Also bought a new can of primer, had the same aligator skin result. Could be incompatible with POR-15 Etching Primer. Next time I'll wipe the area with PPG thinner before spraying to see if that helps.

BMW110716-03

Spent more time on the LH lower front, just above the air dam. Almost there, finally.

posted from Bloggeroid

Sunday, July 10, 2011

Long day on the nose

Saturday was another "long" day. Long in that I was able to work on the E9 for more than three hours. Like the week before, I got a lot done even though it does not look like it.

BMW110709-01 BMW110709-02

The first thing to do was to sand off the last coat of primer applied the week before. I noticed a little breakup last week but it was more extensive after thorough drying.

BMW110709-03 BMW110709-04

As I worked the RH side I spotted a small high spot. Strange that I didn't see it before. I suppose that explains why the PO put so much bondo on the fender. I was surprised to discover that the area was lead, thick enough to file down most of the high spot. Working lead is so easy.

BMW110709-05 BMW110709-06

Over on the LH side I found a low spot just above the side marker light. It turned out to be a high spot a little further back, where the concave curve below the trim line blends into the front of the fender, all convex curves. I considered taking a hammer to it but was afraid of distorting the marker light opening. Besides, it is not all that visible. I decided to do what the PO did, use a little filler to fix the blend.

BMW110709-07 BMW110709-07 BMW110709-08

I did some more work along the bottom of the grill opening, especially where it meets the air dam, and around the bottom of the center opening. Slow going due to the bumper bracket.

BMW110709-09 BMW110709-10 BMW110709-11 BMW110709-12
BMW110709-13 BMW110709-14 BMW110709-15 BMW110709-16
BMW110709-17

The last thing I did was open up the rusted spot at the back of the hood opening, while thinking about how to repair it. I was going to weld it, but access to the back is blocked by the inner fender, and the curves are wicked. Besides, this is not structural. I think the best solution will be two layers of fiberglass cloth; I just need to figure out how to mold it. Note to self: buy a new set of rotory files, because the shop's are shot.

The last last thing I did was shoot all the bare places with etching primer. A thin coat, no dry mud effect.

posted from Bloggeroid


Sunday, July 3, 2011

Still on the nose, regret the loss of Redline

Took Friday off and spent much of it on the E9. Stopped off at what used to be Redline in Kalihi for a wedge shaped sanding block and some wet paper. The paint section looked worse than ever, and still no new Redline oil. I asked about the block and was told to try the "paint center" in Pearl City. Since I had the whole day I decided to undertake the adventure.

Turns out Redline is no more, bought out by NAPA. The paint center does have PPG paint, but the situation with my sanding block is cause for concern. I was told that since it is not a NAPA item it would be 6-8 weeks before it came in, if ever. So what used to be the only professional automotive paint store in Honolulu is now just another NAPA. What a shame. On balance, NAPA is the only store I trust with repair components for average cars, like my van -- water pumps and such. The others sell nothing but junk. For me it is factory original, or NAPA. Anything else is a waste of time. For specialized cars like my E9 and my Lotus there are reputable sources, just nowhere near Honolulu.

Just for fun I decided to locate the new store on Google Maps. Check the comments ... my feelings exactly. The exact opposite of the old Redline.

BMW110701-01 BMW110701-02 BMW110701-03
BMW110701-04
BMW110701-05 BMW110701-06 BMW110701-07

My Saturday session was longer due to no Gamelan rehearsal. Over the two days I got a lot done, but not much "visual progress." Sanding, a little more filler, another coat of primer. Tweaks everywhere. One place that is taking a lot of time is the area below the grill opening on the LH side. Trying to even out some old impact damage and deal with the acute angle at the joint with the air dam.

Exposed a new spot under the LH side light. Not rusted, just pitted, like old damage. Wire brushed, POR-15 clean and prep, filled with Technifill.

BMW110702-01 BMW110702-02 BMW110702-03

One new thing I did was to start grinding out some rusty spots in the underside of the hood and near the windshield opening. Nothing big. Looks like I'll have to weld a patch along the corner of the water gutter, just like the rear trunk opening. Gave all of the exposed areas the POR-15 clean and prep treatment.

I exchanged mail with Coupe King concerning door skins. Apparently he has steel for one side and aluminum (CSL style) for the other. Guess I'll keep looking. I'd like to add one of his air dams, but I'm sure I'd knock it off at the first parking lot.

posted from Bloggeroid