Pics on my Flickr site in a set: http://flic.kr/s/aHsjuLyqcT
Sunday, May 29, 2011
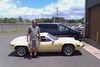
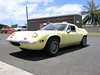
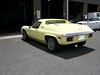
All British Car Day 2011
This is just a quick note that today was All British Car Day. I barely got the Lotus back on the road in time. Weather was nice, as always. Every year there seems to be a few less cars. I suppose as we get older that we eventually give up the hobby, while very few young guys take it up. Sure would be sad if some of these cars ended up homeless. A big mahalo to all the guys at British Car Club of Hawaii for putting on the show, and to the JN Group and Moss Motors, and anyone else I failed to mention, for sponsoring the event. And congratulations to my good friend Patrick Casey, who won Best in Show for his freshly restored Jag. Patrick has a whole stable of Lotus Europas, and has helped me with mine on several occasions. One of the replacement lower links came from him.
Back to the E9 nose
With the Lotus back on the road I can once again turn my attention to the subject of this blog. But time is running out on the van. It needs a new belt idler pulley and again the fans are not coming on. I'll try to do those things at home.
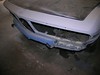
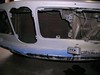
Before I went to the shop I checked here to see what I had last done on the E9. My starting point was sanding down the filler applied at the end of the last session. So many weeks have passed that I had to wash the nose down with soap and water to prevent grinding oily dirt into what I sanding.
The good news is that after a lot of sanding I finally started to feel the contours emerge. This is hard to explain. You start with rust or collision damaged sheet metal, cut holes, weld patches. It is a mess. As the fillers go on and are shaped, something special happens. The long, smooth contours of the original panel begin to emerge. Sanding is not just about smoothing, it is about exposing the original shape.
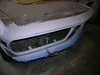
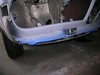
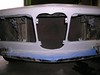
At the end of the session I could feel this happening. Many contrasting layers and colors of paint and filler interfere with the discovery, so I ended the session with a coat of etching primer. I will try to stop in one afternoon and shoot some sanding primer on top, to make next Saturday more productive.
posted from Bloggeroid
Saturday, May 21, 2011
Lotus back on the road
At long last the Lotus is finished. I took some time off this week to get it done.
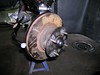
Installed the LH backing plate, steering link, caliper mount. Packed hub bearings, installed hub.
That all went without a hitch, but there are always things that take a lot longer than they ought to. Installing the new tie rod bellows (the English call them gaiters) was a battle. These are genuine, made in England replacements. Problem was, they were a tight fit on the inboard end. I wasted a lot of time getting them on.
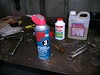
It was now time for paint. Having already washed the frame cross member inside and out with POR-15 Marine Clean and waited a few days for it to dry, I stopped by Thursday afternoon to brush on a coat of Metal Prep to some rusty places, especially on the bottom where it attaches to the body. Mostly it was still good from the last time I painted it. When that was dry I applied a generous coat of Rustoleum.

On Friday, with the paint dry I could finish attaching the new brake lines. Very nice set from Dave Bean. Next I used the shop's dandy vacuum brake bleeder on all four wheels, making sure to keep the master cylinder topped off.
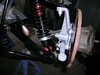
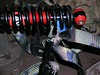
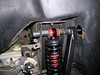
I decided to take some time to raise the rear spring mounts. I did not want to make a mess of the handling so I just raised them 0.75 in. I also adjusted the new front spring to match the RH side.
Spring length
Front, free: 10 in.
Front, mounted: 8.25 in.
Rear, mounted: 12.5 in.
I decided to soften the front damper settings from 22 clicks clockwise to 15.
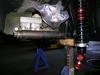
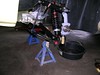
The last time I went through the front suspension I tightened everything with the car on the jack stands. I was told that this was why the front seemed too high even with the AVO shocks at their lowest setting. This time I used a pair of jacks to lift the front wheels until the body was clear of the jack stands before tightening everything. Pulling 50 Ft. Lbs. with the car teetering in the air was nerve racking.
The last thing to do was treat the inside of the frame cross member. Paint was out of the question because of over spray, and brushing would be useless. I chose to blast it with LPS-3. I lost two of the little red tubes inside the frame until I figured out than the cool WD-40 top could fit. I emptied the entire can in there. After shooting the LPS-3 I cleaned the area around the openings with naphtha, then covered them with black Gorilla 200 m.p.h. tape. At that point the car was ready, but I decided to sleep on it. Sometimes something will come to me after I get away from the job at hand.
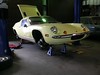
Today, nothing new came to mind so I put on the wheels, took it off the jack stands, and went for a test drive. I like the softer shock settings but that needs more tweaking. Brakes are good, but the pedal is still lower than I like. Need to adjust the MC push rod. Steering is a bit stiffer, but with new ball joints and tie rod bearings this should be expected. Suspension worked fine. The front is a little lower, but still not as low as I would like.
Nice to have the car back on the road in time for All British Car Show at the end of the month.
posted from Bloggeroid
Sunday, May 15, 2011
Lotus lower bolt in place
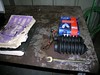
This was a battle I did not see coming. The new bolt came last week (thanks Dave Bean!) . I expected it to slide right in. No gamelan yesterday due to graduation, so I figured the car would be rolling around by the end of the day.
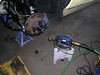
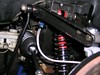
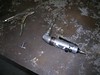
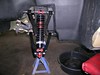
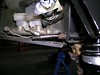
The bolt went in maybe an inch and stuck. Thinking it was just snug I gave it a tap. Stuck hard, could not pull it out. I had to resort to my bolt pulling setup; this time I took a picture.
I tried to run a 0.5 in. drill through the tube. This got stuck, too. I could turn it with pliers and it felt like a burr. The pliers were slow going. At this point I would have used an electric drill, but there was no room -- the bottom of the nose hangs too low. I wasted most of an hour with the pliers with no light at the end of the tunnel. Then I asked Carl. Turned our the shop does have a right-angle drill.
After a substantial amout of drilling the hole finally got free. The bolt still needed some help from a hammer, but it went clear through.
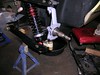
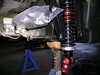
I installed the lower links and the upright. Getting the anti-roll bar installed was a trick, but despite all the bending it fit perfectly. The backing plate is next and ready to go. I do not see any more road blocks.
posted from Bloggeroid
Saturday, May 7, 2011
Lotus: Lower LH inboard link bolt
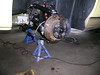
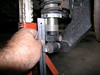
My goal for yesterday was to finish as much as possible without the replacement bolt or tie rod bellows, to include painting the front of the frame. Didn't come close. I spent three hours getting the bolt out.
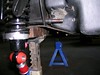
The process was simple. Put thick, oversize 0.5in. washer on first, so the force is applied to the tubing that the bolt passes through and not the frame. The tubing extends about 0.5in. from the frame. Add some 0.5in. drive sockets as spacers, one or more of those robust washers and a plain 0.5 x 20 nut. As the nut pulls tight the end of the bolt should be coming through; do not torque with less than a nut's thicknesses or the threads could be damaged. Tighten until about 0.5in. of thread extends, then disassemble and add more spacers.
I honestly thought I would only have to do this once or twice for the bolt to break free. It never did. I thought that the bolt would spin free, it never did. The torque was high enough to cause me to switch from a standard ratchet to one with a longer handle. Not that the force was really high, it was the repetition that was killing me.
I spent over three hours on this endeavor. Sure, some of that was spent searching for odd ball spacers -- an old ball bearing outer race worked well. Midway through, the bolt threads started to go bad and I had to clean them up with a die.
There was not much to make the bolt so tight. A grove where it extended from the frame. A little corrosion where the bushing went. It IS a precision fit, and maybe those things were enough. But I think the problem was the bend. This sifted the center of force well off center.
posted from Bloggeroid
Thursday, May 5, 2011
Bent lower inboard link bolt
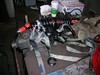
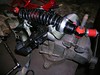
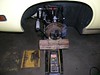
Worked on the Lotus today. Goal was to get the LH suspension built up same as the RH. First challenge: my funky spring compressor. Turned out the solution was easy, remove the short strap, cut a couple feet off the long strap, and use that to tie the ratchet to the spring. Worked great. Exiting when tension is released because it lets go with a bang.
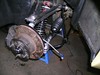
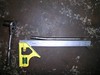
While I was attaching the lower links I discovered the front lower link was cocked aft. A closer look revealed that the bolt is bent. This is the 10 in. long 0.5 in. bolt that runs through the frame. So I ordered a new one from Dave Bean.
I also worked on the anti-roll bar. Clamped the end in a big vise, and me and Carl pushed and pulled. The shock mount hole needed to move inboard 1.5in. Got it.
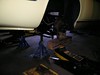
Had to drop the front bottom cover plate to work on the suspension bolt. Looked for rust, didn't find much. Will hit it with Metal-Prep followed by brushed-on Rustoleum. Oh, and all that hardware needs to be replaced, with stainless.
posted from Bloggeroid
Subscribe to:
Posts (Atom)