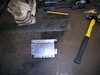
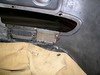
Last week I made the Z-bend for the taillight flange. Today began with trying to hammer a little curvature into the patch, to match the curvature of the body. It does not need to be perfect because it will be finished with POR-15 Epoxy, like the window sill, but a little shape will minimize the thickness. In the process I decided that the only way to cope with the extra thickness along the right edge, caused by a previous repair, was to cut away the upper portion of the flange. That side would have to rely on an upper and lower tab for strength. The upper tab ended up rather small, and I might add some strength there in the future.
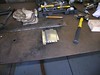
I don't think it shows up in the photos but I used a shrinking hammer on the narrow section of the Z-bend, and used the flat - curved face hammer in the picture on the larger faces, hammering into a shot bag. Worked rather well.
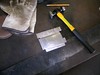
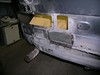
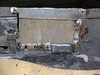
After a thorough scrub with acetone I punched some holes along the flanges to weld through. The places without holes are blocked on the inside. Notice how narrow the top edge became after trimming to fit the taillight opening. That goes back to the Z-bend not ending up exactly where I intended. Oh well, practice makes perfect.
For welding I tried a slightly lower voltage and I held the tip closer to the bead. The welds I did today came out a little better than the last couple of times, except where I welded on the outside. Maybe I needed more light.
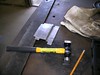
Outside (new patch to your left)

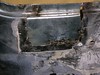
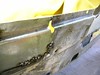
Inside (new patch to your right)
In this last photo I tried to show where the extra layer of sheet metal interfered with the flange I started out with. The original metal can be seen just above the new welds on the inside of what appears to be a previous repair to the same area. My new patch is on the left.
No comments:
Post a Comment