Sunday, July 20, 2008

Preping More Patches

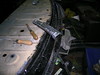
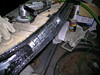
Just a short note to say I spent the day working on the remaining three patches for the rear window sill. Lots of cutting and filing. I was hoping to get all three done and painted with weld-thru primer but time ran out.

BMW072008-01.JPG

My experiment with welding POR-15 has caused me to change plans. For these three patches I will use 3M 051131-05917 Weld-Thru II primer. The label on the aerosol can reads "A Weldable, Corrosion Resistant Coating." The good news is that drying time is rated at 5-10 minutes, so I can paint and weld next week, all on the same day. The bad news comes in two parts. First, the can recommends applying 3-4 coats of the same paintover, followed by a layer of Rust-Fighter I. Or, as a second option, remove all traces of Weld-Thru II prior to applying plastic filler. Neither choice is an option in this case, because the back side of the patch ends up in an enclosed box section.

During the week I picked up a fire-proof blanket from GASPRO, because last week while welding in the trunk area I set two rags on fire. I hope I don't get a chance to see how well it works.

Friday, July 18, 2008

Bringing It All Together

I made a useful discovery last Sunday. Don't paint something with POR-15 that will be welded. I was going to say an important discovery, but that sounds overly dramatic. When POR-15 gets hot it gives off wicked smelling fumes sure to make a hypochondriac pass out, and when it gets really hot it burns.

And now for some good news. I did my first weld on the car. Talk about passing a milestone! Break out the Champagne. Oh wait, this is a German car. A case of Heineken would be more appropriate.

The week before last I did work on the car, but I didn't get enough done to warrent a blog entry. Actually I spent a lot of time talking to Gene about the swap he has in mind for his BMW station wagon. What work I did was all prep for this past Sunday. Mostly working the patch to get the best possible fit. I finished by painting what would be the inside of the patch with POR-15, because after it is welded on there is no access to that side.

One bit of disappointment: Some POR-15 I had applied weeks ago was peeling of in two places. I was looking for nicks caused by repeated trial fitting of the patch, especially when it was one long piece, and in the process found two places a bit smaller than my fist that peeled off rather too easily. I made sure I roughed up the surface to get a better stick before repainting. When it comes to painting, surface prep is everything.

My idea of the wire hook to pull one end of the patch up into position worked great, only it was cumbersome with welding gloves. I set up my welder Using the settings worked out on practice welds and got good results. Some spots didn't bite and create enough penetration. I think I was holding the tip too far away, or else too close. I definitely agree with advice others have given me, that grinding down the welds takes longer than making them.

I made sure each of the patch segments got at least two good spot welds. The last thing I want is to have movement here as that will ruin the finish in a highly visible location. I finished with an application of epoxy putty all around the edges and along the gaps between sections. Later on this will all need to he filled in a lot more, but I want to see how this much turns out first.

Like I said, painting the inside of the patcb with POR-15 before welding was a mistake. For the next one I plan on using weld-thru primer. I am also thinking about drilling a series of holes along the bottom of this hollow box section for applying rust proofing. I'll need rubber or plastic plugs too.

I had a inspiring neighbor that day.

BMW071308-01.JPG BMW071308-02.JPG BMW071308-03.JPG

The first patch to be welded onto the car!

BMW071308-04.JPG BMW071308-05.JPG BMW071308-06.JPG

BMW071308-07.JPG BMW071308-08.JPG BMW071308-09.JPG

Monday, June 23, 2008

Two shows and a little progress

A restoration like mine takes patience and perseverance. Progress has been glacial lately, but after last Sunday's work I sense a big leap forward. I think I have solved the problem of fabricating a patch for the rusted out rear windowsill.

Before I go into that I want to update a few things. Three weeks ago my wife and I attended a birthday party at the sandbar in Kaneohe Bay. The company was great, the food was great, but the sandbar was a disappointment. At low tide it was at most a hundred yards long and six feet wide. On the ocean side the shallow bottom continues out maybe a quarter mile. Interesting, but that's all. There is nothing to do that can't be done on shore, and no bathrooms or showers ... am I a wuss for wanting to be able to pee someplace else besides the water where dozens of people are swimming?

Not long after we had been out there some people reported a strange encounter with a school of sharks. I wouldn't go there expecting to have such an encounter, as it is very rare. You'd be more likely to be hit by a flying beer bottle.

I don't have pics of the sandbar because I did not want to chance getting my Nikon wet, but I do have pics of my Lotus at a couple of car shows. The first was British Car Day at Kapiolani Park, May 25, 2008. The second was a show called Build the Track Day, in support of building a race track on Oahu, held the Saturday of Fathers Day weekend at Aloha Tower Marketplace. You can see more pics, including a nice rolling slide show, at the group's web site. If you watch long enough you will see a a few shots of my Europa, and there is even a picture of me admiring a red open-wheel race car. Look for the guy in a black shirt and black Piloti shoes with red laces. The yellow Esprit and the blue Ford GT got a lot more attention, but at least I'm in there.

Now back to the task at hand. I began by finishing what I had started the last time, cutting the one long patch for the rear windowsill into four sections. After that came a lot of fiddling to see how to make them fit. I ended up doing what my friend Tom had suggested, making a series of cuts most of the way but not all of the way through. This will allow me to flex the piece upward near the ends. My plan is to get it welded in next time. In the last pic you can see the wire hook I made to pull the end up into place. Tom suggested I pre-bend the end pieces and weld the gaps closed rather than messing with it in place.

BMW062208-01.JPG BMW062208-02.JPG BMW062208-03.JPG

Wednesday, June 11, 2008

Delays and Distractions

Looks like I am in another delay phase. Last Sunday was spent attending a birthday party on the sandbar in Kaneohe Bay, This Sunday is Fathers Day and my family wants to take me to brunch which ought to usurp any work at the shop. I may also loose July 6th due to the holiday.

Here's a thought. How about inviting my sons to go out to the shop after breakfast this Sunday and teach them how to do something basic, like an oil change. I'll think about it.

Monday, June 2, 2008

New Approach to Rear Window Patch

Yesterday ended up a milestone in my approach to repairing the E9's rust damage even though it did not start out that way. I decided to abandon my plan to make a one-piece patch for the area under the rear window. What prompted the change was the seemingly insurmountable problem of getting the piece to curve in both a fore-aft direction and laterally. The new plan is to cut most of the way through the patch, leaving the bottom edge intact, to allow the piece to flex, turning a straight line into a smile.

Before I reached that plan I cut the patch into two pieces to try to achieve the same thing. It was really hard to make that first cut.

Last week was All British Car Day and next Sunday is an outdoor birthday party for one of my wife's friends, so progress has definitly slowed a bit. I did manage to get the Lotus safety checked yesterday, but it needs new rubber pieces for the side marker lights. Dave Bean doesn't have them, so getting that straightened out may take some time.

Monday, May 19, 2008

Finishing Up the Putty Patches

Sunday was a really beautiful day in Honolulu and I got a lot done on my E9. The volcano on the Big Island is erupting and for several weeks the winds have been coming from the south, blowing clouds of sulpher ladden gas over Oahu that make Honolulu look like Beijing in August. On Sunday the wind, what little there was, came from the East. The sky was blue. No rain. Spectacular.

Next Sunday is the annual All British Car meet. I'll be there with my '74 Lotus Europa, and because the weather was so nice I drove the Lotus to the shop. The problem with that is that people keep coming over to ask about it. I love showing off my Lotus, but I love working on my E9, too.

BMW051808-01.JPG BMW051808-02.JPG

The first order of business was to grind down the putty I applied last time. My trusty CP 854 4"grinder cuts through the POR-15 Epoxy Putty with ease, but the contours around the tail light are too complex for a grinder, so I switched to a hand sanding block loaded with 40-grit paper. A lot slower than the grinder, but accurate.

BMW051808-03.JPG BMW051808-04.JPG

Like I said before, I don't want to grind down to the surrounding metal surface for fear the patch will fall out the back. In this case this works well because for unknown reasons there is a thick layer of primer in this area and my putty patches should not be thicker than the surrounding finish. I guess the proper technique in thinner spots will be to dimple in the edges of the holes.

As the hand sanding progressed I could see where I was starting to sand through some of the surrounding POR-15 paint I had appled previously. I decided it was more important to level and feather the putty spots, which meant I would have to repaint the exposed areas. When I was done feathering I roughed up all of the surrounding POR-15 coat with 400-grit and painted everything. Next time I'll apply another coat and start building thickness with some kind of aerosol primer, using the black layer as a check layer.

BMW051808-05.JPG BMW051808-06.JPG BMW051808-07.JPG

I spent the rest of the time tweaking the patch for below the rear window. I continued what I started last week, using a pair of vice grip pliers to restore the bends, then carefully shrinking, stretching, and twisting to align the piece with the cut out slot where it will go I got to where the patch fits inside the slot, but it needs more tweaking.

One thing I need to buy is some aerosol sanding primer compatible with my base coat paint system.

I finished the day with a drive out to Hawaii-Kai where I sat outside Starbucks watching Japanese tourists gawking at the Lotus.

Sunday, May 11, 2008

Fun with putty, more shrinking and stretching

This post covers last week and this week. Last week was the Sunday after our gamelan concert on Saturday night, so I got a late start and was very tired even then, with the result that I did not accomplish very much. This Sunday was Mother's Day, but that did not cut into my car time because we had dinner at my mother-in-law's, as usual. Chinese food, from Duk Yee, classic local style Cantonese food. The lesson in all this is that when you undertake a large project, be it a car restoration, a house remodeling, or building a boat in your backyard, you need to allow time for the multitude of activities that life has to offer. It's all about balance.

Note: When I was uploading the pics for this blog to Flicker the response time was ridiculously slow. The uploader even dropped one pic, so that was will appear on Flicker out of sequence. I suspect the reason was people uploading pics from their Mother's Day activities. I upload using Flicker Uploadr for Mac OS X.

The last time I wrote I had ground out some rust-throughs around the right-hand rear tail light to experiment with POR-15 Epoxy Putty as a small hole patching solution. The last step that day was to do the POR-15 wash - prep - paint routine. Last week I mixed up my first batch of putty and filled in the holes.

In anticipation of the putty gushing through the holes I cut a piece of cardboard to function as a backing. The idea was to get the putty to spread out on the back side of the panel. This worked very well, although the cardboard has to be helped by a slender screw driver. As I worked the putty I discovered that even with the cardboard the putty would ooze through the holes rather than build up a solid slug, so I stopped trying to do it in a single step. I let the putty form valleys, or craters, where the holes were, the idea being to use those as a foundation for a second application. This worked really well.
BMW050408-01.JPG BMW050408-02.JPG BMW050408-03.JPG

The cardboard did cause the putty to form mushrooms on the back side of the panel, which is a good way to make it stick. I suppose I should consider window screen, too, especially for larger areas that I can reach. This section was difficult because there is an inner panel blocking easy access (thus the cardboard trick).
BMW050408-04.JPG BMW050408-05.JPG

Today began with grinding down the putty. I am pleased to report that POR-15 Epoxy Putty is perfect for grinding. It feels harder than typical body filler, yet it grinds cleanly and with good control. As easy as cake.

In this next pic you can see where I have ground away most of the high spots, and how this reveals the places where I let the putty push though the holes. Those darker areas are not holes, they are just sunken in a bit. There are three large areas along the top edge of the tail light opening, plus one closer to the trunk opening.
BMW051108-01.JPG

I did not want to grind down to bare metal as this would break the POR-15 seal. It might also weaken the putty patch so much it will fall in. This entire area was ground down to bare metal, and getting there required grinding through a thick layer of primer and paint. So my plan is to create a rivet head effect, and build up the surrounding area back to original thickness using more traditional means.

After grinding I roughed up the recessed areas with 400 grit sandpaper, then mixed up a small batch of putty and filled in the low spots. While it was setting I worked on the rear window patch. At the end of the day I ground down the second layer and discovered that I had not used enough at the upper-left corner of the tail light opening, so I added some more.
BMW051108-09.JPG

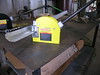
The sheet metal work was all about dealing with the height of the piece. I was very close with the curve, but the center was too high. I decided to work on the right-hand side first, and to bring the end up by shrinking the top edge and stretching the bottom. Up until now I always did the same operation on both edges.

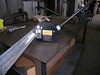
After stretching the bottom the work had a lot of twist.
BMW051108-03.JPG BMW051108-04.JPG

Shrinking the top took out a lot of the twist, and to get ride of the rest I held the work in the vise and twisted it by hand.
BMW051108-05.JPG BMW051108-06.JPG

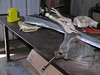
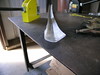
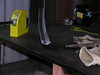
As I worked on the fit I noticed that the two lengthwise bends were opening up. I had made these by bending the piece along the edge of a steel table, but now that the piece was curved I could no longer do it that way. First I tried holding the work gently in the vise and bending with a vice-grip plier with a broard clamping jaw. This worked well in some places, but sometimes it was too tight, so I ended up holing the piece on the table with another vice-grip plier. I did't get of photo of that. It worked, but it is slow.
BMW051108-02.JPG

After working the entire right half I ended up focusing my attention on the last foot, and managed to get back the original shape. Next time I will have to continue the process all the way to the other end.
BMW051108-07.JPG BMW051108-08.JPG