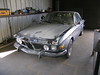

Looks to me like a contender for the World's Ugliest Something contest. Trust me, it is a beautiful car. How good would you look in the hospital, during surgery?
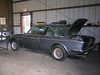
This week's goal was to rip into more rusty places in order to eventually make an honest assessment of the car's condition. The good news is that the typical structural problems with the rocker panels have been taken care of, so the frame is sound. What I have is more like a really advanced case of acne.
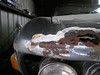
For reasons I cannot fathom, the PO applied a mountain of bondo (I use the term generically) along the upper sides of the front fenders and the nose. As if the hood was sitting too high and he did not want to adjust it lower. I discovered this as I removed loose rust and worked out to solid metal. Then I decided that the cracks in the finish without rust might only go down part way, so I did some exploratory "digs." The next set of pics attempt to show this.
Notice the layers. Her is what I can make out:
- thin gray primer (lowest)
- light gray filler
- original color
- brown filler
- current color (top)

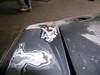
More in back
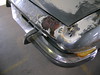
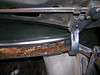
I sort of got started removing the brightwork along the left side. I discovered that in some places it was held on with "V" shaped spring clips while in other places special screws and nuts. I gave up for the day when I discovered I would have to remove the interior next to the back seat ... a good place to start next time.
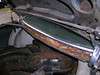
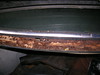
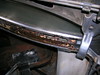
As I worked on the trim my eyes settled on the area below the rear window. Large, deep cracks had formed, suggesting a deep bondo zone. Using a putty knife I had no problem loosening the bondo and exposing a rich deposit of ferric oxide beneith the surface. I cleaned it up a little with a wire wheel, and decided to save what little remains as a guide to making a replacement, so I wet it all down with rust converter.
In the first pic in this series you can see where I saved a long piece of the magnificient bondo sculpture the PO created below the rear window. He must have attended art school. The last pic in this series shows the same area as the third after wire brushing and treatment. I think some of those white spots are paint! What would cause a few spots to hold out while all around them the battle is lost?
No comments:
Post a Comment