Sunday, June 28, 2009

Lotus rear hub bearings, pt. 3

The inner u-joint was a lot less trouble until the very end, but it was still a fight. One bearing ended up a tad tight. I hope this does not rob too much power!

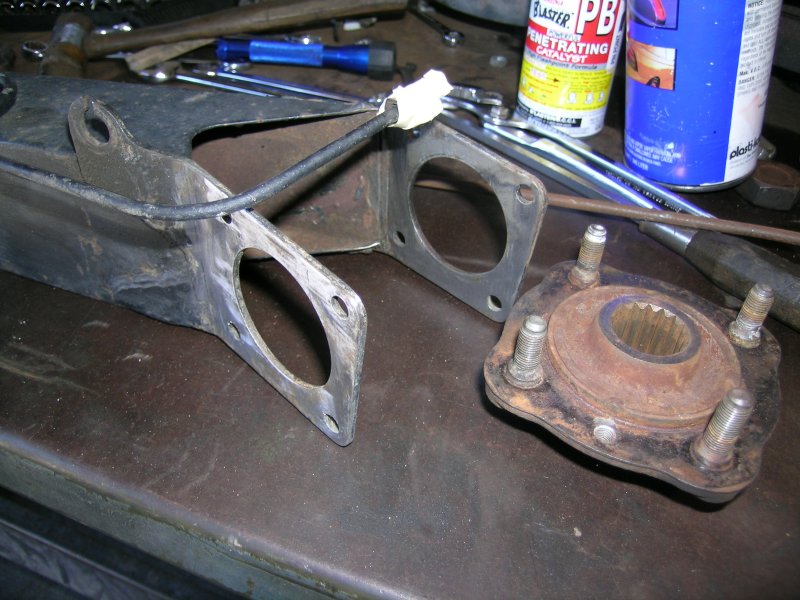
By the end of the day I had istalled the driveshaft in the hub bearings, attached the inboard end of the driveshaft to the transaxle, and installed the forward trailing arm bolt. There were two shim washers between the mount and the trailing arm. In place of the roll pins on the driveshaft coupling I use precision ground AN bolts and self locking nuts.

First thing to do next time is to reconnect the brake hose.

Lotus0906028-01 Lotus0906028-02

Sunday, June 21, 2009

Lotus rear hub bearings, pt. 2

Happy Father's Day!

When I got home from the shop today I was treated to the most fantastic dinner, made all the better by having both my sons there. There was Kirin beer, steak, pepper cured bacon, two kinds of sausage, tomato and artichoke salad, summer squash, and rice pilaf. Dessert was a mocha chocolate pie. There are very few restaurants in Honolulu that could match that meal, at any cost. Pattie really outdid herself.

If there is one thing you can count on when working on old cars, it is that everything takes much longer than it should. By the start of today I had


  • Removed the entire trailing arm

  • Pressed out the drive shaft

  • Removed the hub carrier

  • Removed the bearings and seal

  • Painted the trailing arm and hub carrier with Rustoleum

  • Replaced the brake hose

  • Pressed in the new bearings and seal

  • Mounted the hub carrier

  • Installed the driveshaft into the bearings


Lotus0906022-01 Lotus0906022-02

Lotus0906022-03 Lotus0906022-04

Lotus0906022-04 Lotus0906022-05

Lotus0906022-06 Lotus0906022-07

Lotus0906022-08 Lotus0906022-09

Lotus0906022-10 Lotus0906022-11

Lotus0906022-12 Lotus0906022-13

Last Week I was ready to install the trailing arm when I decided to grease the u-joint. Simple. Only I could not get the grease gun fitting off of the nipple. The effort ended badly, as it so often does with old cars, when the nipple broke off. Up to that point I had decided against replacing the u-joints, but they are twenty years old and rather stiff, so that was the last straw. I ordered new bears from Dave Bean.

Today I figured I would spend an hour replacing the bearings, then continue putting things together, and at the end of the day I would face the problem of having two cars to drive home. Not a chance. By the end of the day I had one u-joint installed. Getting it apart was such an ordeal that I am glade I did not attempt it on the car, as I had planned. The big time killers were broken snap rings, cracked outer races, and filing the gouges created while taking it apart.

Lotus0906022-14 Lotus0906022-15

Monday, June 8, 2009

Lotus rear hub bearings, pt. 1

Yesterday was another all Lotus day. While changing the oil last week I investigated the squeak coming from the right rear wheel, and sure enough it was the dreaded worn wheel bearings. I ordered new seals and bearings for both sides from Dave Bean and they arrived mid-week (what great service!) so I got right to it. Polishing out the flaws in the clear coat will have to wait.

I have had the rear suspension off many times, but I have never done the hubs. It is a job that is notoriously difficult because the hub is installed onto the splined drive shaft with Loctite, and the book recommends heating the hub carriers to remove the bearings ... which means they are a really tight fit.

My first battle was trying to remove the brake drum. This is always hard. I really should design some sort of puller. As I pounded and tugged I could see that the hub was moving on the splines, which was weird, so I opted to take drum off with the hub. Worked like a charm. Once off I just tapped the hub off the drum.

Lotus090607-01 Lotus090607-02

The stopper was in trying to remove the drive shaft from the bearings. It has to come off before the four bolts on the inboard side can be removed, at which point the hub carrier can be slid off the trailing arm. I hit it as hard as I dared, but most of the force was lost due to the hub carrier flopping around.

Lotus090607-03 Lotus090607-04 Lotus090607-05

I knew my friend Patric has done this before, so I called to ask his advice and he recommends removing the trailing arm from the car and using a press. I hope to continue when the shop opens on Wednesday.

As for rust, the subject of this blog, the Lotus had a lot of light surface rust breaking through the steel frame and trailing arm. When I restored the car I wire brushed these areas and painted them with brushed on Rustoleum. I must say, all those places look great. The paint is strong and no signs of rust.

As for the starting thing, thr car started fine after sitting all week, and started right up after a stop at NAPA for some Castrol LMA brake fluid. Go figure.

Sunday, May 31, 2009

Lotus battery, oil, and wheel bearings.

Last Wednesday I drove the Lotus to work. On the way home I stopped to pick up something, and it would not start. All along it has been weird about starting. At best the starter seems to drag for a moment, making a grinding sound, then it will catch and crank with gusto. Sometimes, when the car has not run in a couple weeks, the sagging and grinding last a lot longer, but eventually it will catch. So it seems like a voltage thing. Except that sometimes during a ride, after a stop for lunch or a little shopping, it struggles.

Wednesday was the third time it failed to start. Each time it would not even try to crank. The fuel pump was running, if a bit slow, but when I turned the key to the start position nothing happened. The first time, about a year ago, a nearby service station jumped it with a starter battery. The second time it happened after refueling at Kahala Shell. Last Wednesday a nice young guy from Kaimuki Shell tried to jump start it, but his battery did not help at all and we ended up doing a push start. I drove start home, about a mile.

At this point my theory was that heat from the stainless steel headers was overheating the battery. After a long run and a short stop, it would not produce enough voltage to crank the motor.

This morning I made an elaborate plan to work on the battery. I did not have enough tools to remove the battery, so plan A was to drive the Lotus to the shop and put the battery on the charger. I assumed it would not start. The question was whether or not I could jump start it with the Toyota. If that did not work, plan B was to take the van and bring the tools home, then charge the batter with my own charger. After loading the Lotus with the things I would need to work on the E9 -- mostly paint and the POR-15 stuff -- I decided that according to my theory it it should start without a boost. It did.

As I was driving to work I realized that I might have multiple problems. The overheating might be true, but that did not explain to total failure. That could have been the result of too much stop-and-go driving. The Europa drives the alternator off the back of the intake cam, and the pulley arrangement results in the alternator not putting out enough juice at idle. You might say I have been conducting a long-running experiment, with this premise: the current drain during idle is small and easily replaced as soon as the motor is up at speed. Lately I have been driving in a lot of stop-and-go traffic, during which the battery is discharging. On Wednesday the entire trip home was like that, creeping along in first gear. The failure was a combination of heat and low charge. This morning that car started because the batter was stone cold, but it still could be low. The booster battery did not help because it, too, was flat.

When I arrived at the shop I got the news that the air compressor was out. I also forgot my camera. I hooked up a charger at set it to low, then looked for something to do on the E9 that did not require air. Easier said than done. I was planning how to make the patch to fill the gap at the rear on the new patch I welded in last time. I was bothered by the way the area seemed to be pushed in, like old collision damage. Only this whole area has a lot of body filler, and the low spot could just be where I had ground it away. Before I set about pounding out the dent I needed to remove more filler to reveal the extent of the damage. I might even restore the original shape. But, no air, no grinder, no sander. I could have used my Makita polisher, but it was back home and I have not purchased any sanding disks for it yet.

What I did accomplish was the removal of the trunk latch. Two 10MM bolts hold the catch, and a large threaded ring holds the spring loaded button to the rear panel. It took me awhile to figure out how to remove the ring without the special tool. I ended up using a large slip-lock pliers, very gently.

I already had oil and a filter for the Lotus, so I decided to change the oil and check out the squeak that has appeared, coming from the right rear. Sure enough, with the rear end off the ground I could rock the right rear wheel, ever so slightly, up and down. This is indicator for worn wheel bearings. No more long drives until they are changed.

As for the battery, time will tell. I did some research on replacements and discovered something new, Braille Batteries. The best looking match would be a Carbon Fiber B2015C. Expensive, but small, extremely light, and much better at withstanding heat. Sexy looking, too, so I might just get one on general principle.
Sunday, May 24, 2009

All British Car Day and back to the E9 tail light

Yesterday was All British Car Day at Kapiolani Park. I had my Lotus there, despite the not-so-perfect paint. Everyone was impressed at how good the repair turned out ... I guess the glitches don't look so bad to them. I have posted some photos I took on my Flickr account.

ABCD090523-03

Last time I worked on the E9 I started on a small strip of metal to bridge across a big rust hole in trunk seal flange above the right tail light. Today I finished it, and along the way started to think about how to add the additional pieces required.

BMW090524-01 BMW090524-02

I knew the piece would have tricky compound curves. Just the basic flat piece I started with is curved; the outboard side curves up like a crooked smile. This basic flat piece needed to be arched and twisted, and the arch needed to be tweaked to compensate for the difference in thickness where the underlying metal was missing. To do this I held it in a vise and either applied pressure by hand, or with a pair of pliers. The bends and twists took many trips back and forth from the car to the vice, yet are so subtle it is not easy to capture in a photo.

BMW090524-03 BMW090524-04

I decided that since the original sheet-metal is thinner than my patch it would be better to weld through holes in the original. In the past, when I welded through holes in the thicker patch the thin layer tends to burn through before the puddle fills the hole. To that end I drilled a series of 5/32 in. holes through the flange. This was not possible on the outboard end, because there was no way to get the welder behind the joint. I punched those holes with my trusty pneumatic hole puncher.
BMW090524-05

Just before welding I coated everything with Weld-Thru primer. I tried to clamp the piece in place but the arch made the ends lift, so I took the bold step of holding it in place by hand. It worked! Maybe I just got lucky. I had just enough time left to grind down the welds and apply a thick coat of POR-15 Metal-Prep.

BMW090524-06 BMW090524-07

My plan for next time is to add a piece underneath which extends up and back to fill in most of the rust hole. This piece will be welded to the rear panel, which will provide a solid anchor, and it will form the missing flange edge. If the bends prove to be too tricky I will have to make it in two pieces. When all of that is in place I will fill the gaps with Epoxy Filler. The piece I welded today sits on top of existing sheet-metal, but it is underneath the rubber trunk seal to it will not be visible and the change in thickness should be insignificant.

Friday, May 22, 2009

Lotus in the paint booth

This week I was finally able to juggle my schedule enough to take two days off and have Saturday morning free for All British Car Day. Just enough time to complete the repair of the big scratch.

The paint booth is only open from noon until seven at night, so I spent Thursday morning shopping for a few supplies, like masking tape and paper, and at my regular shop where I wet sanded the entire fender with #600 to give the clear coat some grip.

Once at the booth I spent a gazillion hours masking. Fortunately I have done a lot of this sort of thing, but not for many years.

Lotus090521-01

Lotus090521-02 Lotus090521-03

I mixed the base coat paint 1:1, shot a few test patterns, then shot the car. It held fine for about thirty seconds, then it all started to run. Sigh. Paint, like welding, takes practice, and you have to absorb failures gracefully. Off came all that wonderful masking paper and tape.

Lotus090521-04

Friday morning I washed the car to get rid of all the Monkey Pod tree residue, stopped by Red Line Automotive for a gallon of clean-up solvent and some shop talk about finessing out drips, then back to Ft. Shafter for yet another round of sanding. Then it was off to the paint booth.

Lotus090522-01 Lotus090522-02 Lotus090522-03

This time I took a moment to get a picture of myself in my zoot suit. Notice my new spray gun. It is an Anest Iwata W400-LV, a good quality all-around gun. Attached to it is a small diaphragm regulator, not because I'm fussy but because the paint booth does not furnish one.

The paint I am using is PPG Deltron. The yellow is a custom mix.

Dennis over at Red Line suggested using a little more reducer to counter the runs. That sounds counter intuitive, but I gave it a try. I also spent a lot longer adjusting the gun. From that I learned how sensitive the paint flow knob is. The result was great paint, no runs.

I waited almost an hour before shooting clear coat. Much of that was spent cleaning the gun and figuring out how to read the mixing scale on the paint cup. The clear calls for a 4:1:1 mix of paint, reducer and activator. This would make a good SAT exam question. For the clear I wanted a wider pattern, so more adjusting and testing. It took me minute to get used to painting without seeing the paint -- reminds me of doing the latter coats of a lacquer paint job. Just when I was done something caused a bunch of mystery gunk to fall onto the paint. I think it was a gust of wind blowing under the door.

Lotus090522-04 Lotus090522-05

In the last of pictures I shot I tried to capture the fluff in the finish, but it is too small to see. Trust me, it is very noticeable standing next to the car. I started making plans to come back and do it again, after the show, when I realized that this new paint is no worse that the rest of the car. What I really need to do to make it right is a complete sand down to bare fiberglass.

Lotus090522-06 Lotus090522-07

In the morning I'll be up early cleaning the car, then off to Kapiolani Park for the show.

Sunday, May 17, 2009

Lotus, round two

The month of May is always busy. This month had an extra, unforeseen challenge, the death of the family cat. She was old. A year ago she developed diabetes so I have been giving her insulin shots twice a day. What finally did her in was kidney failure.

On the Saturday before Mothers Day I decided that whatever was wrong was not getting better on its own so I took her to the vet. The blood tests indicated significant loss of kidney function. The only thing they could do was admit her and put her on an IV to try to dilute her blood enough to give her kidneys a chance to catch up. I visited her first thing Sunday morning, then went to the shop as usual, then straight on to dinner at my mother-in-law's house. No time to write my blog entry.

On Monday morning I went to visit her again, only to find out she had passed away over night. Not a surprise, yet sad nonetheless.

What I accomplished last week was to apply a coat of high-build primer to the Lotus. It went rather well, but after a lot of wet sanding with #400 paper I still had some spots with tiny air bubbles, probably caused by applying too thick of a coat. I also took off more primer than I should have at the rear end.

While waiting for the paint to dry I did more grinding on the E9 RH tail light patches. I finally got around to grinding down the lower-left inside corner, giving it a nice radius. In the end a few places needed more epoxy filler. Somehow I managed to not get a picture of this, but I did take some of the paint work.

Lotus090510-01 Lotus090510-02

Lotus090510-03 Lotus090510-04

Today the goal was to fix the air bubbles and end up ready to shoot color. I think I made it. I used brown to help show how far down to sand. Just after the first coat flashed off it started to rain, but after a couple hours the sun came back and it turned out fine.

While I was waiting for the rain to stop I decided to get started on the rusted out area above the RH tail light. This spot extends into the flange that forms the truck opening lip, a rubber gasket runs in the flange. Lots of curves here. After all the trouble I had fabricating the rear windowsill patch I decided to build this one up. I worked on the piece that forms the bottom of the flange (hard to describe since the "bottom" is angled about forty-five degrees. First I made a cardboard pattern, then cut the sheet metal with a die grinder and ground that to the final shape. As I was fitting it I discovered that in addition to having curved edges top and bottom (it's about 0.75 in. wide) it needs to have a twist in it. I'll start with that next time.

Lotus090517-01 Lotus090517-02 Lotus090517-03

Lotus090517-04 Lotus090517-05

BMW090517-01 BMW090517-02 BMW090517-03