Sunday, March 14, 2010

Started working on front end

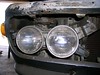
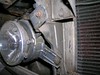
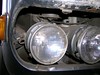
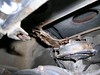
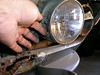
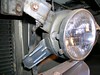
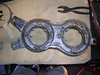
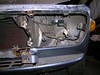
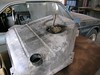
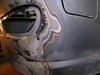
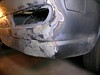
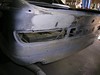
Started working on the front end, mostly to gain momentum. Lots of photos documenting headlight bracket removal.

BMW100314-01 BMW100314-29 BMW100314-30

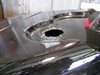
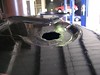
First thing to do was finish tank. Removed tape covering openings, sanded paint edge to feather, did standard Marine Clean - Metal Prep routine. Painted with POR Patch because area was so small. Applying POR Patch next to POR-15 paint revealed Patch goes on thicker.
BMW100314-04 BMW100314-05 BMW100314-06

BMW100314-07 BMW100314-08

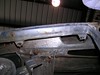
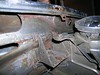
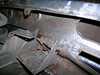
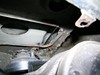
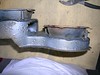
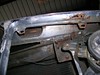
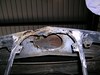
I spent some time inspecting nose area from underneath, and planning how to treat boxed-in area under nose. The upper, exposed sheet metal has some rust-throughs. Three ares will need welded-in patches. But surrounding underside will need treatment, and access is partially blocked by doubler. As see in these photos, the doubler has holes, and on RH especially has rusted away. May need reinforcement. Plan is to wire brush what can be reached and use rolled gauze bandage with knots tied to apply Metal Clean and Metal Prep. Will also use my garden sprayer. Painting will be messy!
BMW100314-09 BMW100314-10 BMW100314-11

BMW100314-12 BMW100314-13 BMW100314-14 BMW100314-15

BMW100314-17 BMW100314-18

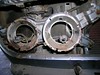
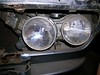
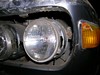
Work on front end continued with headlight removal. Original screws were rusty but came out easily. Three wrong size replacements were rusted in tight. PB Blaster got two, one had no slot and had to be ground off.
BMW100314-19 BMW100314-20 BMW100314-21

BMW100314-22 BMW100314-23

BMW100314-24 BMW100314-25 BMW100314-26 BMW100314-27

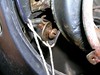
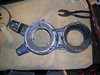
Removed headlight brackets. Bolt at RH outboard serves as ground point, had been replaced by oversize screw and wing nut.

Lamp adjustment uses two hand turned nuts with long plastic handles and one spring per bulb. Note that two adjusters are long and two are short, use long ones in outboard (deeper) bucket. Threaded rod has special plastic hook at end, fits into bucket.
BMW100314-28

Disassembling adjusters was extremely hard. Soaked with PB Blaster and let sit an hour, just able to break loose. I was worried the plastic would break.
BMW100314-31 BMW100314-32 BMW100314-33 BMW100314-34

BMW100314-35 BMW100314-36

Finished the day sanding down previous application of filler at RH rear. Several low spots remained, plus a small hole that requited fiberglass and POR-15 to fill.

Sunday, March 7, 2010

Painted bottom half of fuel tank

Today was simple. I flipped the fuel tank over and refinished the other half.

BMW100307-01

Recently I was bragging about what nice weather we have been enjoying. Well, this week winter finally arrived in Honolulu. Today was rainy and overcast. Which is good because we need the rain.

BMW100307-02

The tank prep work began like last week with cleaning out little pockets of surface rust with a wire brush in a die grinder. This was followed by a thorough sanding, to remove some over spray and to roughen up the existing paint to give the POR-15 something to hold onto. The tank has a lot of flat areas so I did most of the sanding with my CP sander. I did the convex curves mostly with a block sander, and the concave parts with a sponge sanding block.

BMW100307-03 BMW100307-04

This time I did take a picture after painting. Two in fact, despite it looking like a big black blob. I used a sponge brush (cheap and discardable) and although the paint brushes on very nicely, it does tend to run on the vertical parts. If I were spraying I would say I needed to add a little thinner. Not sure if POR-15 can be thinned, or if it would help. Perhaps a better solution would be to use a conventional brush and try to apply less paint.

For my fill-in task I finally went looking for a tire that holds air. Found one, and with some help got it mounted. For now the car sits level. Hopefully next week that corner will not be flat again.
Sunday, February 28, 2010

Painted top half of fuel tank

Yesterday was Big Little Tsunami Day. I spent the day at home because Civil Defense asked that people stay off the roads. KHNL, the local NBC affiliate, provided non-stop coverage. I was fascinated watching the water flow in and out of Hilo bay. Fortunately without damage.

BMW100229-02

Today everything was back to normal. Everywhere I went people were talking about where they were and what they did when they first heard about the tsunami. My day began with a stop at Redline for more POR-15 Marine Clean and Metal Ready -- I used up most of what I had last week cleaning the inside of the fuel tank. Then it was off to the shop. I had to quit early because my good friend Ric Trimillos had a birthday party.

BMW100229-01

I checked the plastic cup I used last week to apply the tank sealer. The paint had set up to something that looks and feels just like plastic, and which popped right out of the plastic cup as though I had used a release agent. Tough, yet flexible.

BMW100229-03

After taping over the filler neck opening I washed the outside of the tank with a medium strength solution of Marine Clean, using a sponge sanding block like a scrub pad. After that I just worked on the top. Next week I'll do the bottom. When the tank was dry I hit the rusted spots (no rust-throughs!) with a wire brush and sanded the entire thing with 180# sandpaper. Then came the Metal Ready, followed by a generous coat of black POR-15. I did not take a picture of the painted tank because it would just be a big black blob.

Sunday, February 21, 2010

Treated the gas tank

No work last week due to the John Kelly Couple's Ride, and watching the Winter Olympics. This week I decided to treat the inside of the gas tank. In Hawaii, if I leave that thing sitting around empty it will be rusted through without treatment.

Lotus100221-01 Lotus100221-02 Lotus100221-03

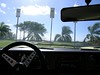
Last Monday was President's Day. I took the Lotus for a spin and it was such a nice day I took my camera and grabbed a few shots out the window.

Redline Automotive stocks POR-15 U.S. Standard Fuel Tank Sealer. I stopped off on my way to the shop and picked up a can. It is expensive, about $50, but that is a lot cheaper than making a new tank.

BMW100221-01 BMW100221-02 BMW100221-03

The procedure is basically the same as for regular POR-15 paint: clean and de-grease with Marine Clean, treat with Metal-Ready, and protect with tank sealer. The instructions called for hot water cleaning, but there is no easy way to get hot water at the shop, so 80 deg. "room temperature" was as good as I could manage. I was surprised how much dirt came out!

BMW100221-04 BMW100221-05 BMW100221-06

BMW100221-07 BMW100221-08

The challenge is doing all three steps through a single two inch opening. The first thing I did was remove the sending unit. The book says to use two crossed screwdrivers ... I expected to be told I would need a special tool. Before trying that I sprayed some rust disolver lube around the edge, to avoid shredding the rubber seal. I taped over this opening and used the filler pipe because it is in a better position.

While I was waiting for the tank to dry between steps I did a little work on the rear panel. Mostly filling in the remaining low spots.

Sunday, February 7, 2010

Rear end looking good, pondering front end

BMW100207-01 BMW100207-02

Today was Super Bowl Sunday. Based on previous experience I decided not to waste the day watching the game (it started at 1:30PM here), so I Tivoed it and went to the shop. Turned out to be a pretty good game.

Not much to write about. Most of my time today was spent applying TECHNIFILL and sanding it smooth. Good thing it cures fast. With POR-15 Epoxy Filler the cure time is at least four hours. With TECHNIFILL I can get in several iterations in one day. I almost have that pushed-in area at the RH lower corner where I want it, which means more filler than I like but a lot less than what was there. I also worked the LH rear, same as last week. I don't think I need to hammer it.

Next Sunday my wife and I are doing the annual John Kelly Couples Ride, so I won't be working on the car. I don't like to leave exposed surfaces even for a week, because here in Honolulu they will start to rust. Two weeks is worse. So, when I finished today I covered the entire rear end with a coat on Acid Etch Primer. I know primer does not block moisture very well, but it is better than nothing. If it were going to be longer I would use finish enamel; that's what I did for the rear window sill (which still looks good). Another reason for laying down a coat of primer is that it removes the variations in color. This gives a more realistic view of how the part will look painted.

BMW100207-03 BMW100207-04

BMW100207-05 BMW100207-06

BMW100207-07 BMW100207-08 BMW100207-09

Back when I was grinding down to bare metal on the RH side I noticed how thick the paint was on this car. I not talking about Bondo here, but multiple layers of paint. My Lotus suffers from bubbling which experts have diagnosed as being the result of too many layers of paint. One of my goals for the day was to blend in the painted area to the bare section, just past and slightly forward of the RH rear tail light. I think what I need to do is pick out a layer and sand the entire car down to that layer. In today's pics you can see a yellowish white layer that looks promising.

I also coated some areas on the inside with Metal Prep, and sealed the patch edges with Epoxy Primer. The goal is to prevent moisture from collecting between the layers of sheet metal. There is still a lot of welding repair work left on the inside, around the fuel tank mount. I want to paint the entire inside with white POR-15.

While waiting for stuff to dry I spent some time looking at the front end. I think my plan was good, start with the back to develop my skills and the front later, when my skills are better. I think I am ready, although I wish my welding were better.


Sunday, January 31, 2010

Two patches RH rear panel

I did not write last week because I was in the middle of upgrading my Fujitsu T1010 notebook. Now it is mostly working, except for a few little things. Like tonight I discovered I cannot import photos from my Nikon Coolpix 5400, the camera I use to take the pictures posted here. So I will make a quick note, and when I have the photos I will expand.

Last week was all about making the larger of the two patches for the RH rear. These are low, under the bumper line, which is why I had to remove the fuel tank.

I began by inspecting more closely the repairs exposed by the removal of all that bondo. This first sequence tries to convey how uneven the surface is.

BMW100124-01 BMW100124-02
BMW100124-03 BMW100124-04 BMW100124-05
BMW100124-06 BMW100124-07
BMW100124-08 BMW100124-09 BMW100124-10 BMW100124-11


This patched needed a lot of shaping. To fit perfectly would require tricky compound curves. For this I don't need perfect, just a foundation upon to apply filler. I did spend some time trying to get it to fit nicely, but I wanted it welded in by the end of the day, so when it was as close as I could get it, in it went.

BMW100124-12 BMW100124-13 BMW100124-14

Today began with the discovery that none of the welds higher up were strong, so I had to redo that part. Not a big deal.

BMW100131-01
BMW100131-02 BMW100131-03
BMW100131-04 BMW100131-05

Next came cutting and shaping the smaller patch. This one also needed so compound curves but not as radical. I managed to get a closer fit. After welding and grinding I filled in the gaps with POR-15 Epoxy Putty. I also put a fiberglass patch on the small rust-through above the larger patch, using POR Patch.

BMW100131-06 BMW100131-07

While the putty set up I went back to the LH side and sanded down the last batch of filler. That high spot under the tail light really causes a problem. I decided to let it show a little, but I did add back some of the filler I had ground off earlier. A compromise. If it takes too much filler I'll try hammering it down with a shrinking hammer.

BMW100131-08

With the putty mostly set up I continued to play with the TECHNIFILL filler on the RH side. Having discovered why it is so thick over there I know it will require several applications before that area is smoothed out.