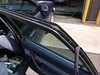
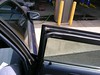
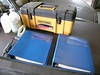
I took advantage of the nice weather to do a little work on my wife's trusty old Toyota. A few spots of rust have appeared on the top of both rear doors, where moisture collects under the rubber door seal. It was a simple job compared to what I do with the E9 but the same in principle, knock off the loose rust, lightly sand with #100 paper, clean with POR-15 Metal Klean, treat with Metal Prep, and paint with POR-15. It turned out rather nice.
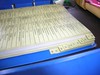
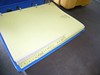
Last week I mentioned the pair of manuals I purchased from Bill Proud. Since I was in a picture taking mood I took a few of them. They even came with the correct yellow tabs, all in their place. Very nice.

My E9 work began with a light sanding of the black primer applied last week, the goal being to reveal the high spots. Once I had a feel for the terrain I switched from #100 to #80 and did some serious shaping, stopping only when the high spots were down to bare metal.
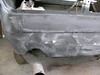

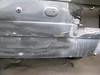
At that point I should have shot the bare places with etching primer, but I still do not have the knack for doing more than one thing at a time. So I planned on painting at the end of the day and switched to making the sheet metal patch for the right tail light.
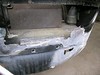
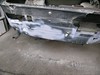
Until today I had planned on making the patch from a single piece, but as I was laying it out I realized that it will require some tricky compound bends, the sort that have caused me problems before. The body panel curves away to the outside as it wraps around to join the side, and the opening curves upwards, also on the right side. The patch needs to flanged, a "Z" bend about 1/4 in. deep and with a 1/2 in. edge.
The solution I came up with was to make the patch in two pieces. One will begin at the body panel with a right-angle bend inward, and the other will form the inside edge, also with a right-angle bend that will overlap the first. I should be able to achieve the compound curve using my shrinking and stretching tools. If it gets too crazy trying to match the curve along the overlap I'll resort to using tabs.
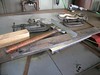
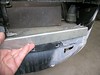
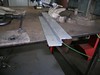
With the new plan in place I cut two 2 in. wide strips of sheet metal and bent a 1/2 in. right-angled bend in both. I left plenty of extra material for trimming later. Not having a brake is really a drag at times like this, so the bends required a lot of pounding with a hardwood black and a large ball-peen hammer. Fortunately the shop has a sturdy steel top workbench. Somewhere along the way I latched onto a large slab of thick steel which I use when I clamp pieces like this to the table. It works, but a brake would be much better.
At the end of the day I wanted to shoot the bare spots with etching primer, put some POR-15 Epoxy Filler in a few low spots, then finish with a coat of sanding primer. Unfortunately I did not allow enough time, and the etching primer ended up where I wanted to put the filler. I waited as long as I could and tried to apply some filler, but I'm afraid it will not stick well.
No comments:
Post a Comment