Today I finally remembered to bring my camera tripod, so the first thing I did was to take some pictures of the window sill without flash. I'm still not satisfied. The light from the open bay door did not reveal the surface shapes. I only uploaded two pics, the places I worked on last week.

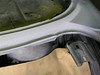
Last week was spent filling in low spots. Some were just glitches, but two affected the actual shape of the piece. Both were where the new material blends into the existing surface near the corners ot the trunk lid. After roughing up the surface with 100# sandpaper I built up the low spots with Epoxy Filler, waited an hour, and just as the instructions promised the filler was set and ready to work. I can't say enough about POR-15 Epoxy Filler. Fantastic stuff.
Even though the window sill needs a little more work, I decided it was time to bring some other problem areas to the same level. I had already started on the back end, so I went there.
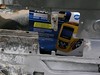
Since starting to do hammer forming I picked up a couple of small shot bags. I used one and a sharp ended hammer to tighten the bend that creates the inset flange for the tail light.

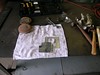

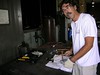
(The greenish-yellow light is not the sheet metal, it is caused by the mercury vapor lights. That strange looking old man holding a hammer is me.)
As I worked I developed a plan for how these patches would fit together. Rule #1: Fit for ease of welding and strength, then fill in the gaps with Epoxy Filler. Corollary: Do not waste time getting a perfect fit.
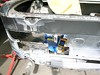
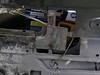
So far I have two patches almost ready for welding. One goes behind the opening for the rectangular rear fog light. The other, with the hammer formed flange, repairs the lower right corner of the left tail light. The fog light piece will end up behind part of the tail light piece. The last of today's photos shows them roughly in place.
No comments:
Post a Comment