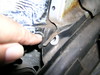
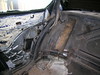
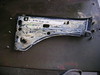
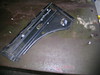
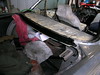
Previously I had removed the interior panels, but to get to the rusted areas I needed to remove the electric window lift mechanism. First I removed the six 1Omm bolts that attach a black bracket to the body, but the bracket would not come out. A chrome trim piece running along the door jam was in the way, and it was attached with pop rivets. Out came the drill. I only had to drill out the top two rivets to free the bracket. At the top of the bracket are two unusual looking bolts that appear to be adjusters. The bolts have slotted ends and lOmm lock nuts. I think they center the glass in the slot. Anyway, I loosened them to get the bracket out but I'm not sure I needed to. One more thing. The rear upper corner is sandwiched in with two other pieces. Check the photo.
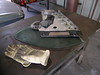
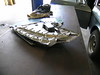
After I had the first bracket out, getting the actual motor bracket was a snap. The motor has two wires, one black, one blue, black going to the forward connector. Turns out the window needs to be mostly down to get the thing out; I used a 12 volt jumper battery to crank down the window. Removed two bolts at the bottom and lifted the whole thing out, glass and all.
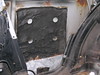
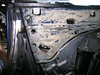
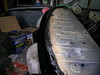
Behind all this, stuck to the body sheet metal, is some soft stuff probably intended to damp vibrations. I think that needs to come off to treat this area with POR-15, so I'll need to come up with a replacement, something that doesn't absorb moisture.
Another thing. The upper portion of this panel is painted, but the bottom is bare galvanised. I wonder if some rust repair was previously done. Given the amount of moisture this area gets because of the window opening, I wouldn't be supprised.
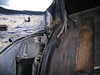
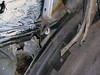
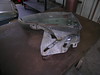
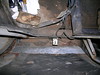
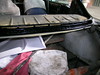
Finally, here are some shots of the area I painted with POR-15. I used the same little can that came in the kit, which I had sealed with plastic wrap the last time I used it. It was in perfect condition.
No comments:
Post a Comment