Today I moved the car to a different bay at the shop. The guys who work there decided to move the used tire storage from where it had been to where my car was. Something to do with keeping an eye on it. Maybe some folks thought the tires in the pile were useable -- ka-raish! The good news is that the new spot is on the lee side, so when it rains, like it has been, I won't have wet air blowing in on my rust spots. The bad news is that the lee side is the West side, so it gets the afternoon sun. This summer I'll probably lose ten pounds every Sunday from dehydration.
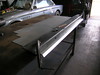
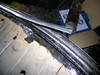
Last Sunday being Super Bowl Without Green Bay I worked on the car. Previously I had cut and bent the patch for under the rear window. Now it was time to curve it.
In cross section the piece looks like a V with a base, like this:
\_/
The sides are almost at right angles, which ASCII art will not depict correctly. On the car the above section will rotate about 120 degrees, so that the left side will be vertical, the base will slant to connect the edge of the window opening and the edge of the trunk, and the right side will angle down slightly, overlapping under the window opening.
The bend is mostly a bow shape with the base on the long edge. My plan was to hammer the base with a smooth hammer to stretch it, and hammer the two edges with a shrinking hammer. The combination should produce the necessary bow.
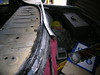
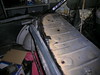
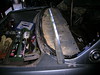
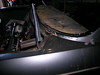
It didn't work. I got a beautiful bend, but in the wrong direction. In the end my interpretation, which is almost completely without experience, is that even though I was hitting the edges with a shrinking hammer they still stretched, and the base stretched in all directions when all I wanted was to make it longer. At first I used a steel die, then later I tried a wood die thinking it would help with the shrinking. No change. I never did snap a pic of the result. Probably because I was too mad. Bit I should. I finished the day cleaning up the repair area, thinking I would get on a coat of POR-15. But it started to pour, really hard, so POR-15 was out. I just hit it with a lot of metal-prep.
During the week I thought about what to do. My first idea was to abandon the formed patch and attempt a built-up patch. The problem with that is that one of those edges is exposed, and should be a bit radiused. A welded joint would be ugly, especially if I made it. I could set it down and build up the surface with bondo, but on such a big area it will eventually crack and fall apart. I ended up deciding to buy a shrinking tool. As soon as I post this I'm going to check out Harbor Freight. Good thing I kept that failed attempt, maybe I can save it. Or most of it.
No comments:
Post a Comment