Saturday, September 24, 2011

Moved my storage stuff

Just a note to say that I didn't work on the E9 today because I moved all the bits and pieces to a different storage shed. The old shed is next to a structure that is being torn down before the wind carries it off to Kauai.

I had a few minutes after the move, but the Honolulu Century Ride is tomorrow so I decided to take it easy. Had more time to eat lunch before gamelan.

posted from Bloggeroid

Wednesday, September 21, 2011

Door window lift motor

BMW110917-01

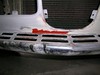
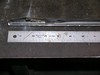
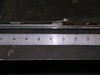
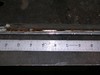
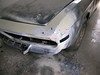
Started the day fiddling with the nose. Sanded some filler along the bottom edge, still had some pits so added more red glazing putty.

BMW110917-02

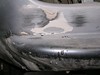
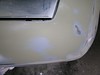
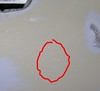
Sanded a spot on the RH side, still had a low spot about the size of a quarter (grey in the photo), sanded off the primer and applied Technifill.

BMW110917-03

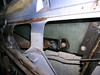
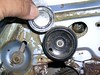
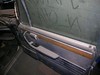
While waiting for filler to set I got started dismantling the door removed last week. The book describes a Bravaria, which is just different enough to be useless. The trick is to raise the window (used a booster battery), remove four motor mount bolts, pull out wire harness, remove lift arm from window, then, and here's the trick, run the motor as if lowering the window to fold it into a small enough package to extract through the opening in the door.

BMW110917-04 BMW110917-05 BMW110917-06

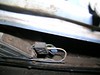
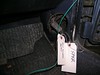
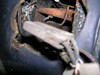
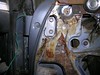
Some details. There is a rubber grommet where the harness passes through the door frame. Inside the door the harness is secured with a bend-over clamp. A ground wire from the motor attaches at the motor bount bolt.

All that took so long I never got back to the nose. No problem, it'll be there next week. By the way, Honolulu Century Ride is Sunday the 25th. I'll be doing the full hundred miles.
posted from Bloggeroid

RH Door Off

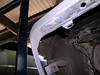
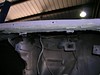
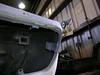
Last week I was trying to create some visual progress and got stuck removing an odd looking bolt. Today I succeeded. Anyone who has been watching will see the change, a gaping hole where the passenger door used to be.

XXbolt BMW110910-01 BMW110910-02 BMW110910-03

I tried a number of tools on the bolt but nothing held. It seemed to be unusually tight. Finally resorted to a special extration tool with sharp inward-facing teeth that bite into and grip the head. Destroyed the bolt, but got it out.

BMW110910-04 BMW110910-05 BMW110910-06 BMW110910-07

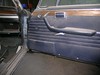
I got right to work disassembling the innards, to get the door ready for its new skin (which I have yet to order). The example in the book is from a Bavaria, so it took some head scratching to figure out how to remove the innear trim piece and window molding. The vent window knob retaining screw become accessible after popping off the plastic insert; stick something through the hole in the back. This was not mentioned at all in the book.

BMW110910-08 BMW110910-09
BMW110910-10 BMW110910-11
BMW110910-12 BMW110910-13

I took a series of pictures of the window molding where it attaches to the door because I think I'll need to remove all those clips to replace the felt.

Right away I can see I will need to do some welding to repair the top inner edge.


posted from Bloggeroid

Saturday, September 3, 2011

Door Skins, day 1

I never got around to writing last week's blog. On Saturday night we attended the 50th anniversary concert of the Hawaii Gagaku Ensemble, and Sunday was taken up by a long bike ride. It's been busy.

BMW110827-02


Last week was unusual in that the shop was full to overflowing. My E9 was overshadowed by a row of trucks.


BMW110827-01


Smoothed out the Epoxy Filler applied to the RH corner last time.


BMW110827-03


Underside of LH grill opening after grinding down the excess POR-15 from the fiberglass patch. To be filled in with TECHNIFILL.


BMW110827-04


This is to remind me to work on the RH side.


BMW110827-05


RH corner after shooting with POR-15 Etching Primer.


BMW110827-06


The bump in the middle of the curved is a weld seam from when the car was made, or old repairs. Cannot get that any lower.


BMW110827-07 BMW110827-08


Last thing done was to apply TECHNIFILL on the underside of the LH grill opening.


It's been a couple weeks now since I started looking for door skins. So far the most promising source has been Classic Heros, an English shop specializing in BMWs. Hey, they use an E9 on their web site, so they must be okay. I got a nice reply from Barney Halse saying they probably have them in stock, but he was out of town on vacation. I worry that the shipping will exceed the purchase price.


BMW110903-01 BMW110903-02


Now the the nose is just about done I decided it was time to make a big step forward, so today I focused on getting ready to fix the doors. Step 1, remove the inner panel on the RH door. Remove the latch handle, then the arm rest. The book described clips around the edge, but mine had screws. Typical old BMW shop manual.


BMW110903-03 BMW110903-05


Found the connector for the window motor in a recess behind the kick panel. Also found a lot of light surface rust, which I will need to treat. The two hot wires were easy, just a couple of push-on terminals connected to a large plastic block. The ground wire was another story. First, it was loose. The connector is a ring terminal attached to the frame with a screw. The screw has not been tightened, possibly because it is next to inaccessible, but it is now rusted solidly in place. I ended up cutting the wire ... I would never put it where it was. This might explain why I had a ground problem with the door windows.


BMW110903-04


I lost a lot of time fiddling with that ground wire, but I was determined to get the door off. I call it "visual progress." I ran into a stone wall when I discovered the FWD upper hinge bolt does not have a standard hex head. It looks like a Torx head, but my Torx tool did not fit tight enough to turn it. That was my day.

Saturday, August 20, 2011

Bad paint

When I arrived at the shop this morning the door to my stall was open. No doubt this was because of the heat we have had the past few days, but since it has probably been a year since the last time it was open, the sight of the exposed rear end was a bit of a shock. It made me realize that I did a lot of nice work back there, but I moved to the front long before the back was anywhere close to finished. Now at the front, my progress has slowed because I am trying to achieve "paint ready." I did not go that far in the rear because I was worried about my ability to repair the nose.

The only real challenge left is the doors. Everything else is time and money. Replacing doors skins sounds straightforward, but since I have never done one it remains a challenge. Right now the challenge consists of finding them -- nobody I have contacted by mail had replied.

I spent some time today on the lower front panels, sanding and filling small voids with putty. Very close to paint ready.

BMW110820-01 BMW110820-02

BMW110820-03 BMW110820-04

The last part of the session was spent fixing the alligator skin primer on the LH corner. I wet sanded it smooth with #150, and went a little deeper just to be sure. I thought perhaps the problem was a layer of oil from sitting in the shop so long, so before painting I scrubbed the area well with Marine Clean, then treated the exposed metal with Metal Prep. When that was dry I shot it with POR-15 Etching Primer, because beneath this area is a fiberglass patch. I thought the poor adhesion may have been due to the POR-15, even though the bad paint covered a much wider area. The result looked good, but I had to go before it was completely dry.

A couple of notes. First, I don't think it is a good idea to paint directly over an application of Metal Prep. A better method would be to rub the dried surface with Scotch Brite, to improve adhesion. Second, in places like this where oily dust may have settled on the surface, wash it with Marine Clean and use Scotch Brite rather than just a brush.

posted from Bloggeroid

Saturday, August 6, 2011

Sand, sand, sand

If I feel like I didn't accomplish much today it's because all I did was sand. That and a spot of TECHNIFILL. Now my arms are sore!

BMW110806-01 BMW110806-02

BMW110806-03 BMW110806-04 BMW110806-05

BMW110806-06 BMW110806-07 BMW110806-08

The center grill opening is very close to done. In the last set of pics you see that the arches need a little more work. I could stop now and the car would look pretty good ... but I jwant it to look "wow."

Saturday, July 30, 2011

More nose, a little buffing

Before getting to this week's work, I want to share a nice YouTube video I picked up on Twitter via @classicheroes. It captures the classy side of the coupe beautifully.

BMW110731-01 BMW110731-02

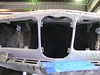
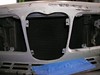
I got started today with that blob of filler in the center grill opening. A while back I bought a new rotary file bit to use in the die grinder, because the shop's is worn out. Today was my first time using it. Worked great on those concave curves. I had some work to do to center the downward pointing dip. I wanted to take more off on the RH side but am down to bare metal, so I have to extend the LH section downward to balance it. I also noticed a low spot on the LH side, on the forward facing section bordering the grill opening. For these places I decided to switch to TECHNIFILL, because the amount to fill is small and I could do more than one cycle today.

BMW110731-03 BMW110731-04 BMW110731-05

While working here I noticed that I had lost some of the indent where the upper panel joins the front panel. I decided to see if I could re-create it, but I ran into metal right below the primer, so I'll just leave it alone. This area is covered by the trim strip.
BMW110731-06

While the filler set I decided to experiment with cleaning up the grill, with the help of my Makita buffer. I started with the compound I got for cleaning up the Lotus after I repaired the scratched paint, Meguire Fine Cut Cleaner . When that did not work a miracle I tried Griot's Mag Wheel polish, the stuff I used to polish the carbs on the Lotus. This is a more traditional metal polish, the kind that stinks and needs a good stir before using. Again, no miracles. I decided to bring all that stuff home and work on it by hand after dinner, while watching TV.
BMW110731-07

Back to the nose. After a round of sanding I could see I was getting close, but I needed a little more thickness in a couple places. I added another layer and called it a day.
posted from Bloggeroid