Sunday, January 17, 2010

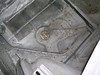
Removed tank, found old damage

It took a great deal of will power to tear myself away from the Vikings - Cowboys game. Luckily my Tivo was there. Who could have predicted the final score after the Vikings' opening drive? Brett Favre is still amazing.

BMW100117-01 BMW100117-02 BMW100117-03 BMW100117-04

I decided to tackle the gas tank removeal first thing, while I was fresh. Turned out to be an easy job ... the tank drops in from above and a PO hadn't bothered to bolt it down!
BMW100117-05

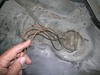
Before disconnecting the three wires to the fuel gage sending unit I made a note of their colors and position. Standing at the back of the car, looking straight down, the fuel line goes off at 3 o'clock. Just to the right is the brown wire. At 12 o'clock is the brown with yellow dots,and at 6 o'clock is brown with a black stripe. We drained out the two gallons still in it to use in the shop's tow truck. I want to treat the inside with POR-15 Fuel Tank Sealer, but I doubt anyone in Honolulu stocks it.
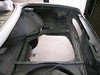
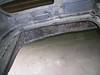
BMW100117-06 BMW100117-07

BMW100117-10 BMW100117-11 BMW100117-12

BMW100117-13 BMW100117-14

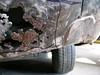
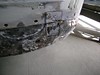
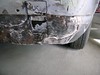
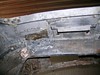
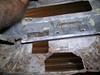
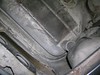
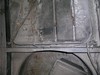
With the tank out I spent a few minutes inspecting the area and found more evidence of what I already suspected, old collision damage. What surprised me this time was the poor quality of some of the work. My plan is to leave alone as much as I can, and re-do what obviously needs to be done. I need to get under the car and remove that fuel line before I can weld the crack.
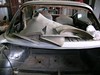
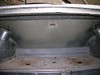
BMW100117-15 BMW100117-16 BMW100117-08 BMW100117-09

I finally got around to removing the white plastic wheel well covers. I also checked out the rubber drain plaugs along the floor ahead of the wheel well and tank area. They turned out to be dried and crumbly, not savable.
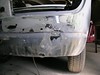
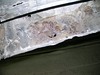
BMW100117-18 BMW100117-17

The reason for removing the tank, beyond the fact that it needed to be, was to weld this area.
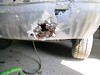
BMW100117-19 BMW100117-20

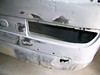
Just a few minutes of grinding revealed a thick coat of bondo covering an old collision damaged area.
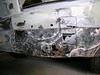
BMW100117-21 BMW100117-22 BMW100117-23

I spent a good halk hour grinding away all the bondo. There is no reason for it to be so thick below the bumper.
BMW100117-24 BMW100117-25 BMW100117-26 BMW100117-27

Look how thick it is, 1/8 in.in places.
BMW100117-28 BMW100117-29 BMW100117-30

I cut out the damaged areas, and cut two patches from my sheet metal stock. I finished with wire brush scrubbing with POR-15 Marine Clean followed by a coat of Metal Prep. Next week I'll shape and flange the patches, and hopefully weld them in.

Sunday, January 10, 2010

The rear end is in sight

Today I got the feeling that I was almost done with the rear panel. There is a big hole on the right below the bumper line, and to weld there I need to remove the gas tank. But really that is not much. Looking ahead brings the question, where next? There are two good choices, the doors and the nose. I started at the rear to develop my skills in a less conspicuous place. The doors and the nose are roughly equal in this respect. The difference is the nose is horizontal, so easier to weld. But maybe I should treat the doors to keep the holes from getting bigger.

BMW100110-01 BMW100110-02 BMW100110-03


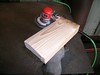
The first thing I did was to make a sanding block with a convex face. I had the wood left over from the welding bottle cradle. Lacking a wood plane, I did some rough cuts with my sawzall, then finished with a lot of power sanding. It works.

BMW100110-04 BMW100110-05

I used my new sanding block to smooth out the filler applied last week. Worked great.

BMW100110-06 BMW100110-07

I needed to add a little more TECHNIFILL filler, and finally got to a small but deep low spot just below the RH corner.

BMW100110-08 BMW100110-09
BMW100110-10 BMW100110-11
BMW100110-12
While I waited for the new filler to set I went back to the LH trunk lip and gutter. Ground down the epoxy filler applied last time. Also worked the area above the tail light opening, where I had patched some small holes with fiberglass. Found a low spot.
BMW100110-13 BMW100110-14
Finished the day with one more application of filler on both sides.

Sunday, January 3, 2010

TECHNIFILL

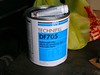
Last week after fixing the Toyota I finally stopped off at Redline Automotive. The main thing I was after was some body filler, something to fill in -- no pun intended -- between the POR-15 Epoxy Filler and high build primer. Bondo is the popular choice, but I have heard there are better products, including some from POR-15. Redline is a PPG dealer, and they recommended PPG TECHNIFILL DF705. Expensive, but gets you a whole gallon. I hope I can use most of it before it goes stale.

BMW100103-01 BMW100103-02 BMW100103-03

Some exploratory primer removal around the RH taillight revealed four low areas, which I used to test my new filler. I put too much activator in the first batch and it set up just as I was attempting to apply it. The second batch went on fine, although I was not prepared for how thin it is.

BMW100103-04 BMW100103-05 BMW100103-06

While waiting for the TECHNIFILL to cure I went back to the LH taillight. I used my grinder to rough in the shape of the trunk seal gutter, then finished with hand sanding. I had a few low spots on both sides, so I applied some POR-15 Epoxy Filler and went off to lunch at 99 Ranch. After lunch came a lot more sanding, and the day ended with another round of Epoxy Filler followed by acid etch primer to ward off rust.

BMW100103-07 BMW100103-08 BMW100103-09