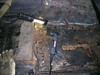
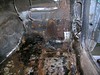
This was one of those days when I felt like an archaeologist on a dig in ancient ruins. I set out to experiment using my Craftsman Multi-Tool to remove the thick layer of tar covering the passenger's floor. Worked well. A bit slow at first, but after the scraper blade warmed up from the friction the tar would melt and progress was much more rapid. After that the only problem was tar build-up on the blade. I made a video of the tool at work, at the bottom of this post. It works a lot better than a held held putty knife.
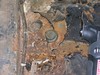
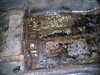
Not long after starting I dug up a rubber plug. There was another just like it under the first. Eventually I pulled it out and could see the shop floor through the neat hole. Must have been a factory drain hole.
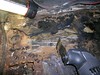
A little later I found a seam. As the sheet metal was exposed I could make out the outline of yet another patch. This was was professionally welded in, unlike the entire floor already removed, and the patches I can see at the rear side of the front wheel well. Obviously this coupe sat out in the rain a lot, leaky rubber window seal and all. That, or a PO enjoyed driving around with the windows down regardless of the weather, something I can sympathize with having driven this car on Hawaiian rainy days. That is when you really miss air conditioning.
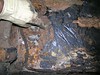
There is still a thin layer of tar which will take a lot of elbow grease to remove. Along with a pile of rags and a large bottle of acetone. Next time. I did spray the entire area with POR-15 Metal Ready, to stop the rust from spreading.
No comments:
Post a Comment