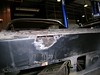
I began by sanding down the POR-15 Epoxy Filler a bit only to discover the area was still too low, so I added another layer and worked on the badge mount while it set.
I bought a propane torch to heat the badge mount but I could not get it to burn properly. I tried a hot air gun and it seemed to help. The basic technique is to create the dish by hammering on the shot bag, then flattening the warps with a hardwood or steel dolly. Soft to curve, hard to flatten. I don't know how general that rule is.
After sanding down the new material I could tell that the low area was finally filled. I stopped short of making it final because I lack the necessary sanding blocks for good concave work. I finished with a coat of etching primer.

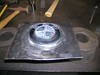
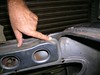
Today I began by working on the badge mount. During the week I learned that my problem with the torch was that I had the gas on too high. Now that I had a nice blue flame I could take out the work hardening. When I had the shape close to finished I drilled some holes for the badge mounting studs, polished off the surface rust with a wire brush in the die grinder, and gave it the POR-15 clean and prep routine.
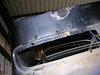
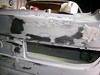
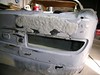
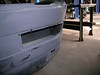
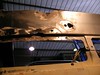
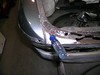
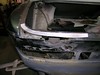
Next I turned my attention to the rusted areas on the LH side between the tail light and the trunk lid ... pretty much the same area as I have been working on the RH side. There is one big area and a lot of small rust-throughs, especially along the top edge of the tail light opening.
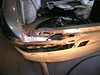
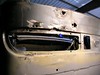
After grinding a bit some of the smaller rust-throughs merged. In this respect I was more agressive than in the past -- my goal used to be to preserve as much original metal as possible, but now I prefer to remove rusted areas back to full thickness steel.
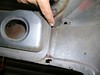
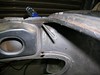
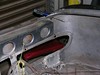
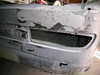
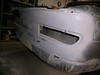
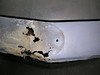
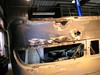
As the damaged areas were removed it became apparent that there is a tricky place where a doubler panel attaches to the rear deck, where the weather seal goes. This area is rusted through and will be difficult to repair properly. A lot of bad stell needs to be removed, making a large, structuraly sound, welded on patch a requirement.

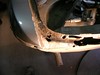
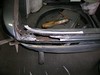
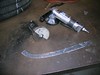
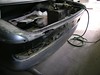
There was still some time left so I decided to make a pattern for the patch I was thinking about. The patch will need a spiral twist. I got as far as cutting out the piece and getting close to the finished size. All in all a very good day.
1 comment:
It is rather interesting for me to read that blog. Thanks for it. I like such themes and everything connected to them. I definitely want to read a bit more soon.
Post a Comment