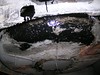
What I did last week was review the patch design that I have been working on, apply a second coat of POR-15 to the fiberglass, and apply POR-15 to the outside areas concentrating on the places that the hole I am trying to cover provides access to. When I applied the glass I decided to use my tube of POR Patch because it really is POR-15 in a tube and I was worried it might dry up. This time I was going to be covering a lot more area so I opened my can. Surprise! It had set up solid. But wait. When I shook it I felt sloshing. Sure enough, after a bit of work with a screw driver and hammer I broke through the rock-hard skin and found plenty of liquid underneath. When I was done I re-sealed the can with plastic wrap, but I really should buy a new, smaller can the next time I paint.
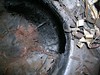
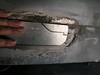
Today began with grinding away the drips and runs from where the patch will go and cleaning the entire opening down to bare metal with my trusty wire brush in the die grinder. I really did plan on welding today. I guess I underestimated how much I had to grind the bottom edge to get the fit right, because that ended up consuming most of my time today. Grind and fit, grind and fit. I found myself wishing the car was on a lift, but this way I get more exercise.
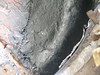
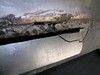
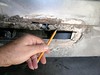
When the perimeter was finally the shape I wanted, I realized it wasn't. All along the top edge is where the trunk floor is welded to the rear panel. The hole I am repairing was caused my moisture collecting in the area, exacerbated by previous collision damage which must have compromised the paint. Over at the top right corner a significant piece of the original rear panel extends down and is securely attached to to the floor piece. This sheet metal is at the same height as the patch I am making. If I left it the way it was the patch would stick out noticeably. Even though this area is obscured by the bumper, the lump would be as obvious as a day one pimple. I could grind away the old metal, but that would weaken the joint. I decided to cut away that corner of the new patch. I know this will make the joint messy, but that is easy to fix with Epoxy Putty. I ended up drawing the cut lines but not cutting, in case I get a better idea during the week.
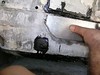
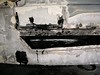
Before leaving I shot the opening with Weld-Thru primer. I just don't like leaving metal bare in Hawaii, even for a week.
No comments:
Post a Comment