Saturday, April 30, 2011

Lotus RH suspension mostly done

Last week was the UH Manoa Gamelan concert so no time to work on cars. On balance, Dave Bean shipped my shock and anti-roll bar bushings, so today I had all the big stuff. I still only had three hours today, so if I want the car on the ground in time for All British Car Day I need to take a few days off from work.

Recently I bought new grease to pack the hub bearings, but I still needed gear oil for the trunnions and new zerk fittings, so I stopped at Redline. They had the oil, but no zerk fittings. Why is it always little things are what hold you up?
Lotus110430-01 Lotus110430-02

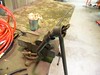
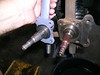
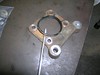
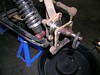
The guys on the Europa mailing list recommended liquid dish detergent to lube the bushings, so I brought along some. Hard to find plain dish soap! I expected a battle but they went together easily. I gently clamped the bar in the vise and used the jaws to backup the bushing.

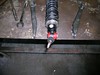
While working on the bushings I noticed the angle of the bend at each end was different. Not the little bend, the big one. Probably a side effect of the crash impact. I won't be able to set it straight until the shocks are in place, because I need to know the distance between the bottoms of the shocks where the bar attaches.
Lotus110430-03 Lotus110430-04

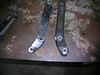
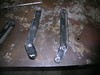
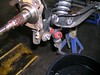
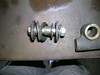
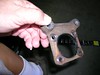
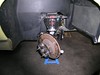
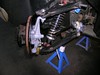
I finished assembling the RH upright -- the steering link and backing plate. Greased up the hub bearings and added the hub. Couldn't do the tie-rod because I still don't have the steering rack bellows.

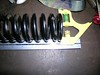
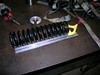
Since I got the new shock I thought I'd spend what little time remained getting out my home-made spring compressor. Made an interesting discovery. I have to compress the spring to even get the top mount point even with the top of the spring, but the nylon strap will not fit between the spring and the mount. Catch-22. That will take some thought.


posted from Bloggeroid

Saturday, April 16, 2011

Lotus RH upright

It's amazing what you don't know.

I was talking to Ken at Dave Bean about my springs, and he said that at 10 in. I was already low. Then he asked me if I had tightened the inboard bolts with the suspension in static ride position. I knew I had to do that with the rear lower links, but not the front. Duh. That saved a bunch of money!

Still waiting for parts (shock and anti-roll bar bushings) but I went ahead and assembled both uprights. Attached the upper ball joints, and lower trunnions, with new rubber bushings for the trunnions. Coated the inside of the trunnions with gear oil -- same Red Line 75W90NS I use in the transaxle. Applied light grease where upright contacts rubber seal. Note: trunnion with LH thread goes on LH side of car. Why would that matter, with so little rotation? Another note: fill trunnions before putting back on the road.

Removed the old brake hose, which was a fight. Loosened the lower inboard bolt, so that suspension will settle.

Lotus110416-01 Lotus110416-02

Installed the RH upright. Used my hardware on the ball joint instead of what came with the kit from Moss, because mine looks like better quality. Did use their bolt on the bottom, because for whatever reason I had used the original the last time I had it apart. Would have done the whole thing but the steering links needed another coat of paint.

Saturday, April 9, 2011

Lotus tie rods

Yet another short session today. But the good news is that the shop was even open.

First order of business was to remove the tie rod end bearings. Easier said than done. I had to use a really big crescent wrench across the top and bottom of the bearing and a long 3/4 open end on the lock nut to break the nut loose.

BMW110409-01 BMW110409-02

In the midst of that battle I was distracted by the arrival of a very nice BMW, a Z4 M coupe. I offered to trade for my E9 but the owner turned me down. Just as well. The trunk is too small to store the junk in my van.

Before I forget I need to record the number of turns to remove the rod end bearings. LH 22, RH 21.5. Surprisingly similar.

Lotus110409-03 Lotus110409-04

I wanted to remove the tie rods for painting and to lube the ball and socket, but the RH was so tight (yes I folded back the locking tab) that I decided it was not worth the risk of breaking something else. I ended up cleaning and painting in place, after slipping a sheet of plastic over the ball and socket to keep it clean. Same for both sides. After studying these photos I realize I should touch up the frame here, too.

posted from Bloggeroid
Saturday, April 2, 2011

Lotus parts painting

No photos today because nothing photogenic happened. Cleaned (media blaster) the other caliper mount and both backing plates. Sanded the LH upper links. Shot everything with Rustolium Primer followed by grey or black depending on the part.

Discovered I need new steering rack boots. Could not loosen tie-rod ends, shot with PB Blaster. Need to pick up small can of black Rustolium.

posted from Bloggeroid
Saturday, March 26, 2011

Lotus spring compressor

The goal for today was to experiment with the cargo tie down spring compressor idea recommended by several list members. I picked up a pair of 1,000 lb. ratchet cargo straps from Home Depot -- I chose the ones with hooks thinking they would hook onto the springs. Well, that didn't work out. The hooks are too big to fit between the coils, as well as the gap between the spring and the shock body. Besides, even if the hooks fit the springs are too short. So, I tied the straps to the springs. Easy on the long end, just use the end without the hook and use a double half hitch. The short end took some creative threading, with only enough room for s single half hitch.

Lotus110326-01 Lotus110326-03 Lotus110326-02

The ratchets worked, but not quite enough to get the collar off. I think the knots were pulling into the take-up winch. I could compress the spring enough before reaching the next click, so I asked a buddy -- Mike, working on his Miyata -- to help out. He pulled and I grabbed the collar with pliers. My advise: do not grab the collar with your fingers.

The ratchet worked well enough compressing the spring. When it comes to uncompressing this technique leaves something to be desired. All you can do is fully rotate the ratchet and pull on the release. Bamb, it lets go all at once. Good thing I had the end tightly clamped in the vise.

Lotus110326-04 Lotus110326-05

The result: my front springs are 10" long. I plan to get shorter, stiffer springs to get the nose down where it belongs.

Lotus110326-06

I got the upper links off last week, so after the spring was done I pressed out the bushings. I was going to press in the new ones but the paint needs touching up. I also wanted to get a second coat on the anti-roll bar, and a first coat on the steering arms. I did the bar and the arms, but ran out of time to finish the upper links. Next time.

Saturday, March 19, 2011

Lotus anti-roll bar

I got my Moss Motors order this week, tie rod end bearings and upright rebuild kits, so I was going to take Friday off to work on the car, but things got complicated. A bunch of folks heading to Japan, and they need laptops and BlackBerrys. Not only did I have to come in, I had to work late, which blew away my chance to attend the First Hawaiian Bank Auto Show. Oh well, at least I felt like I was doing my little part to help Japan.

Would you believe it takes longer to set up a BlackBerry than a web server? Four hours minimum!

Lotus110319-01 Lotus110319-02 Lotus110319-03

Today began with taking pictures of the Lotus fuel lines, something I promised the mailing list. The Europa Twin Cam has two fuel tanks. Lotus ran 1/4 in. hard plastic lines through rubber grommets in the frame, with press-on rubber fittings. Those fittings eventually deteriorate, causing fuel leaks. Many a Europa has met its doom from fuel fires. I replaced the plastic hoses with stainless steel brake lines, connected by short lengths of fuel line and clamps.

Lotus110319-04 Lotus110319-05
Lotus110319-06 Lotus110319-07

The consensus of the mailing list was that I should be able to straighten my bent anti-roll bar. It took longer to set up the press than it did to straighten the bar. I did it in many small steps, moving the support blocks to avoid too much stress at any one point. Piece of cake.
Lotus110319-08 Lotus110319-09
Lotus110319-10 Lotus110319-11
Lotus110319-12

I spent the remainder of the morning between painting the bar and disassembling the LH suspension. Before painting the bar I had to remove the remaining drop link. I cut away as much of the rubber bushing as possible, at which point the link practically fell off. The picture only shows the bar painted primer, but I did shoot one color coat before leaving.
My goal for the suspension was to measure the length of the spring, so that I can order shorter replacements. I bought a pair of rachet tie-downs to use as spring compressors (another list recommendation). Maybe I can cut out at lunch time next week and see if this works.
posted from Blo

Saturday, March 12, 2011

Lotus lower links, part 4

What a week. A bunch of parts arrived for the Lotus so like I mentioned last time I put in for some leave, the idea being to bring the car in, put it up on jack stands, and get it done without it becoming a permanent shop fixture. On Sunday I hurt my back replacing a toilet, and was not up for working on the car until Friday. Then Thursday night the tsunami hit Japan, setting off Civil Defence sirens all over the island to get people to evacuate low-lying areas. The whole family stayed up to watch the outcome on TV. So Friday did not get started much before noon. I did spend what was left of Friday at the shop.

Lotus110311-01 Lotus110311-02 Lotus110311-03 Lotus110311-04
Lotus110311-05 Lotus110311-06
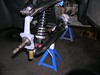
After putting the car up on jack stands and removing the front wheels I got to work disassembling the suspension to see if there were any surprises. There were. Getting the anti-roll bar off was a challenge typical of crash damage, the bottom end of the damper is bent aft so much the bar would not swing down.

Lotus110311-07 Lotus110311-08 Lotus110311-16
Upper bolts are 1/2 in., bottom two are 9/16. Bottom forward is long and takes a nut, the other three tap into the upright and take split washers. Note seal on inboard side of caliper mount.

Lotus110311-09 Lotus110311-10

Lotus110311-11 Lotus110311-12 Lotus110311-14 Lotus110311-13
Trunnion threads onto bottom of upright until just snug. Washers and bushings are a maze. Rubber boots missing from the ball joint and tie rod end. Not a trace.

Lotus110311-15 Lotus110311-17
Removing the ball joint is easy on the bench. I painted the caliper mount and the ball joint before deciding to order new ball joints.

Saturday was the usual three hour run.

Lotus110312-01 Lotus110312-02 Lotus110312-03
Lotus110312-04 Lotus110312-05 Lotus110312-06
I started out taking pictures of some parts to ensure the LH and RH versions do not get mixed up during painting.

Lotus110312-07 Lotus110312-08 Lotus110312-09
The caliper mount is positioned with raised bosses and gasket inboard, felt seal outboard.

Lotus110312-10 Lotus110312-11 Lotus110312-12
Lotus110312-13 Lotus110312-14 Lotus110312-15
With the anti-roll bar finally off the car I could tell it was too bent to re-use as is. Could not find a way to get rubber bushings on and off. Just for fun I split open the damaged drop-link, its bushing was already split and unusable.

Lotus110312-16

Looks like I'll need a new anti-roll bar, the bushings, and new front shocks. Might change the springs while I'm there, to lower the ride height.